More pattern repeats: True Bias Lodo dress

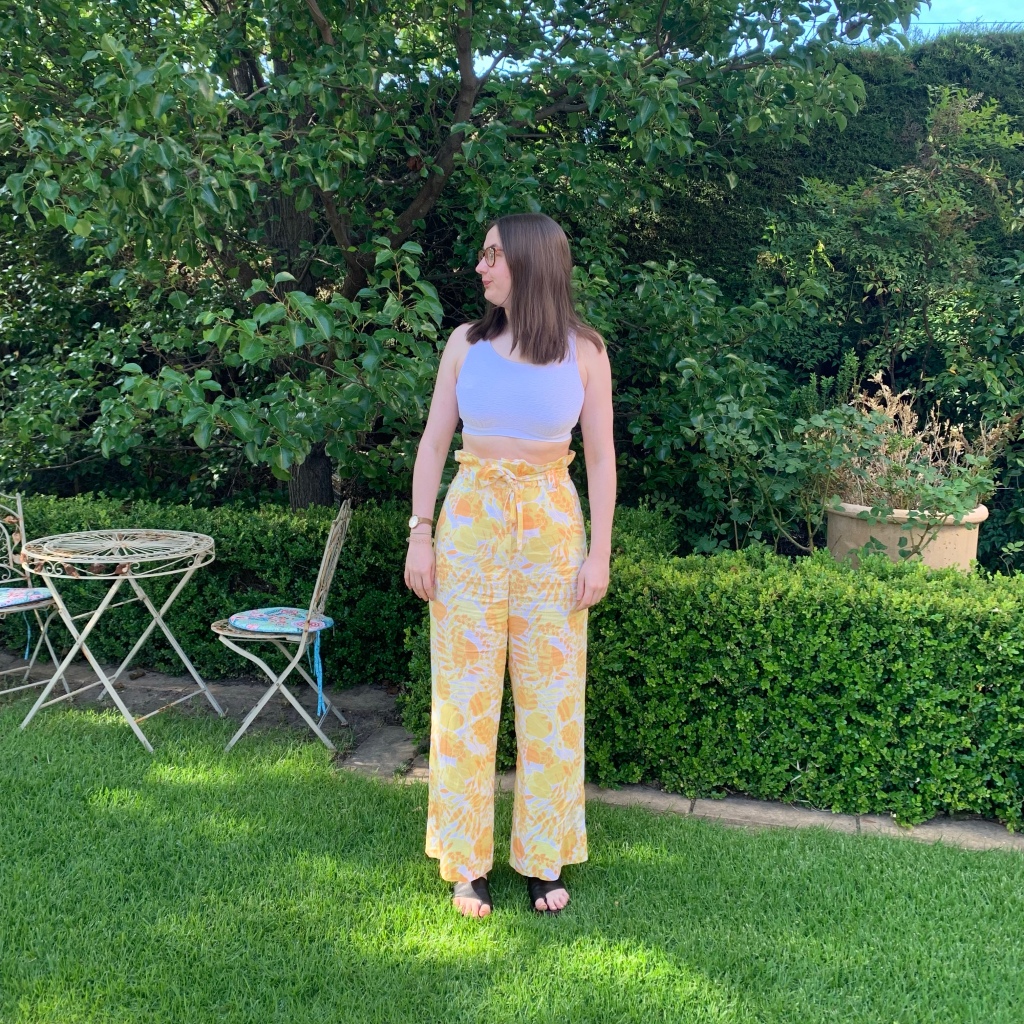
I love this pattern. I made it four times in quick succession when I first purchased it. And now this summer I’ve made it three more times over about 6 weeks.

It’s an excellent simple shape for stretch fabrics. Using a woven fabric to face the neck and grown on cap sleeves/extended shoulders is practical and also an opportunity to introduce some whimsy.

My versions are halfway in length between view A and B and this summer I made them in a size 18.

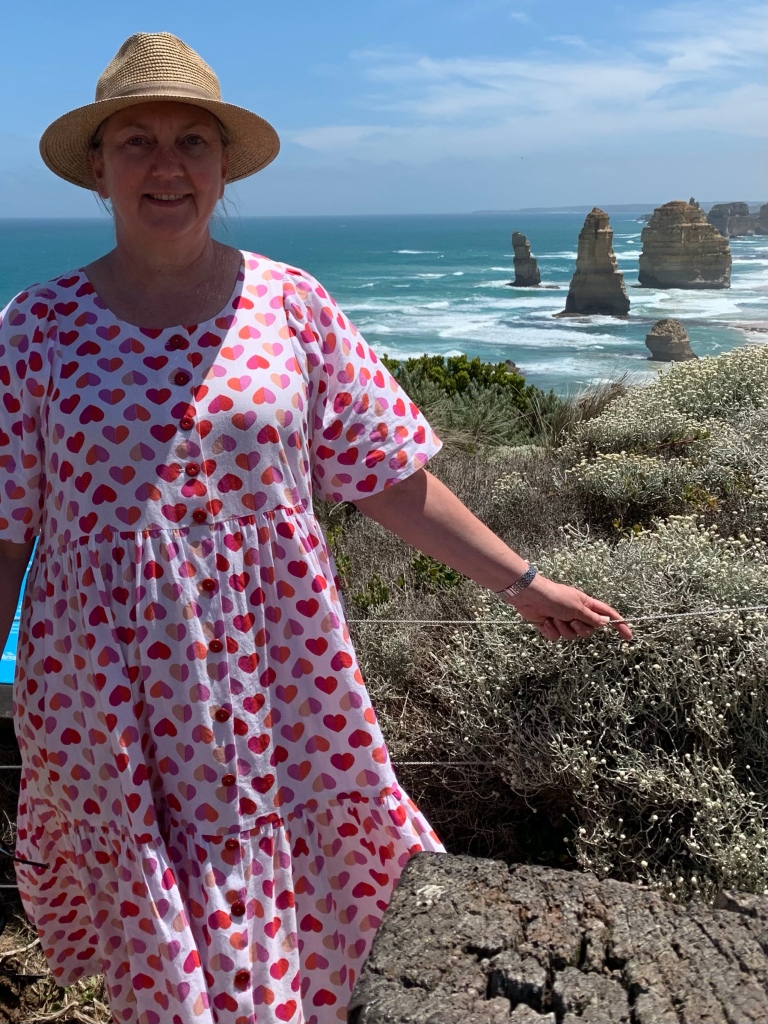
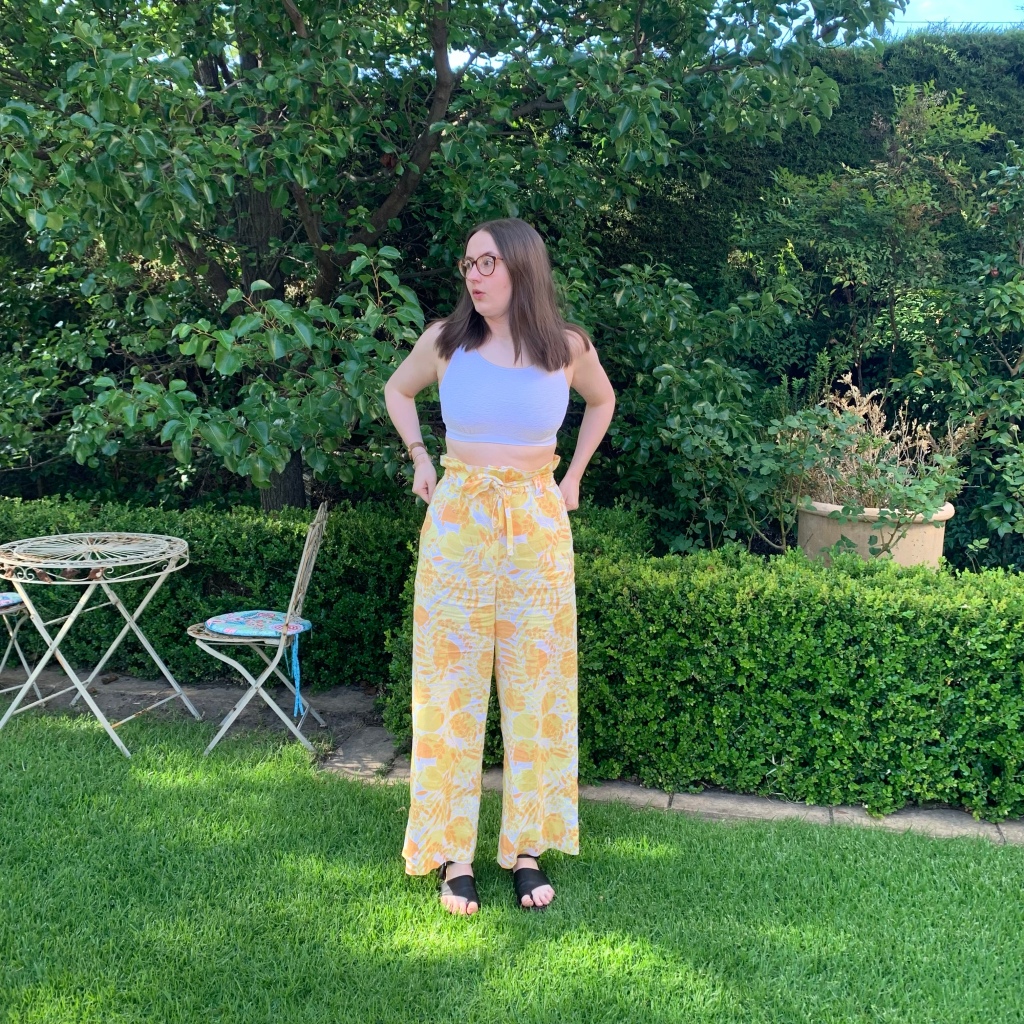
The orange and hot pink one

This is classic Lodo. The fabric does all the work. It’s a viscose nylon spandex woven stretch fabric from Spotlight, my local bricks and mortar store.

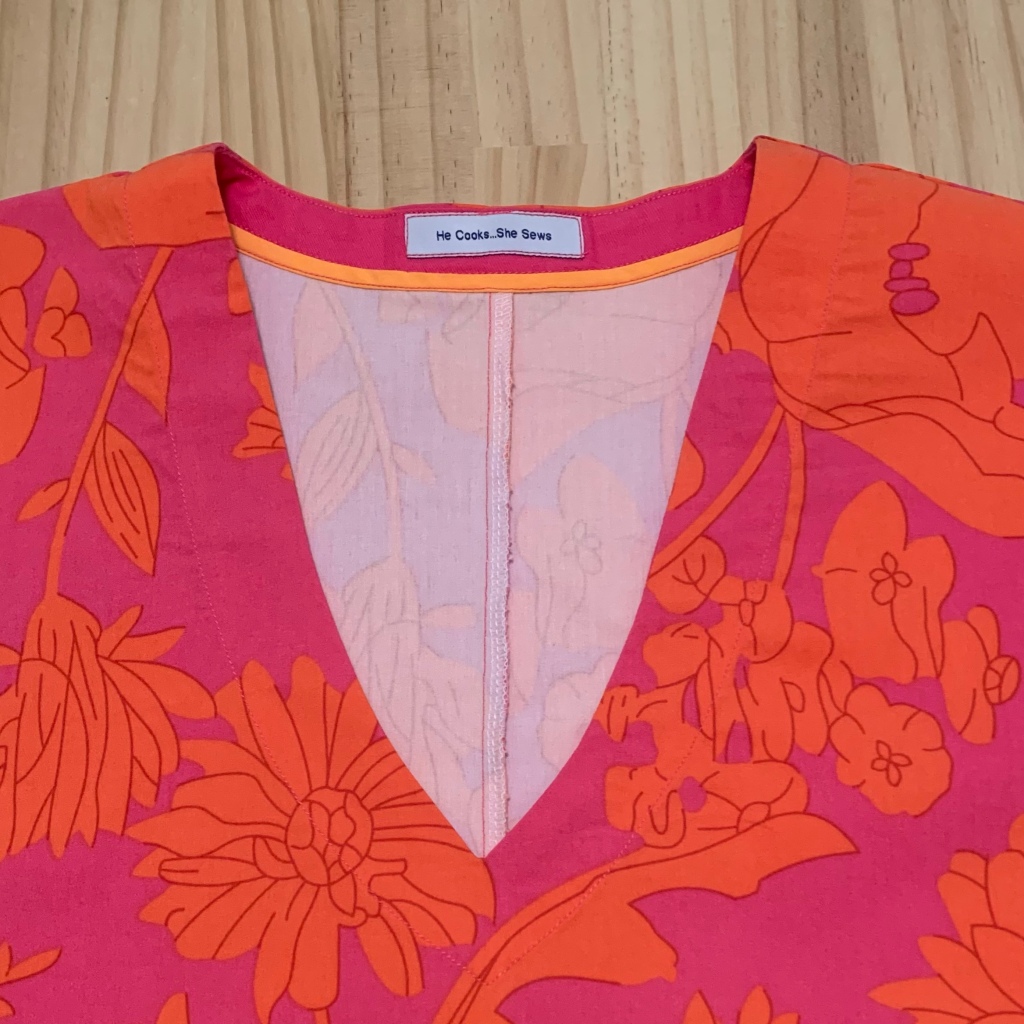
I added to the fun with a hot pink woven cotton for the facing, bound with yellow-orange bias binding.

It really is fun!

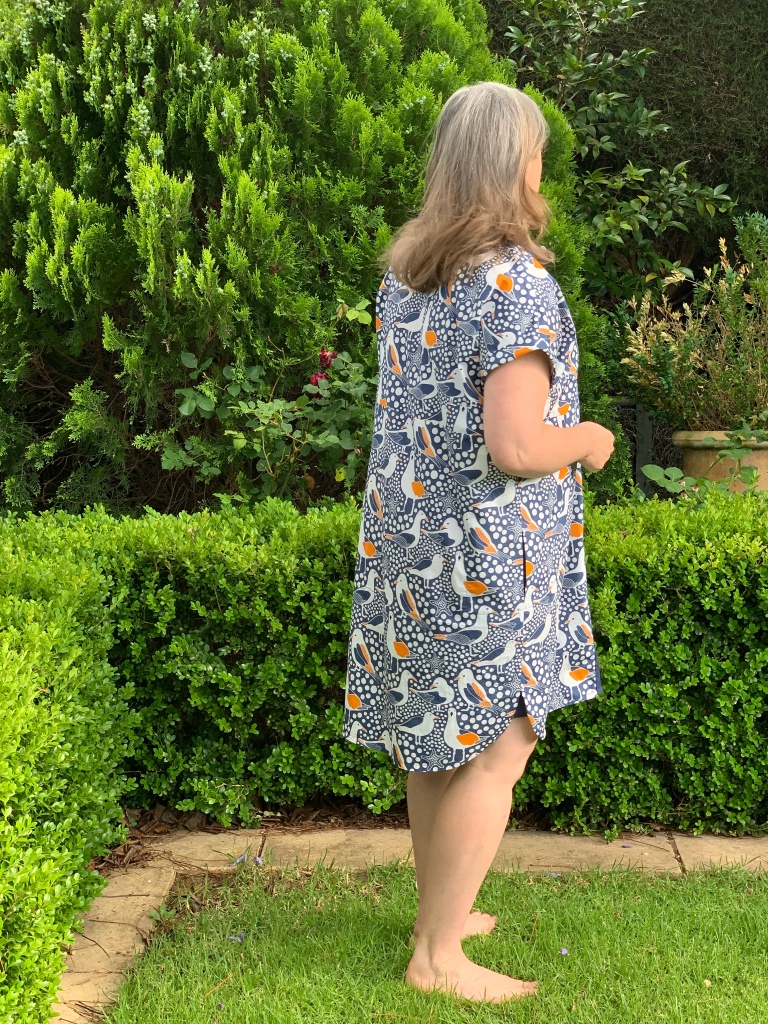
The navy version with ruffle sleeves

This was an experiment. What happens if I add gathered rectangles to the extended shoulders/grown on cap sleeves?

Will it make a corporate dress look interesting, but in a good and stylish way? Particularly if I use a very corporate-y navy fabric?

I think it has!

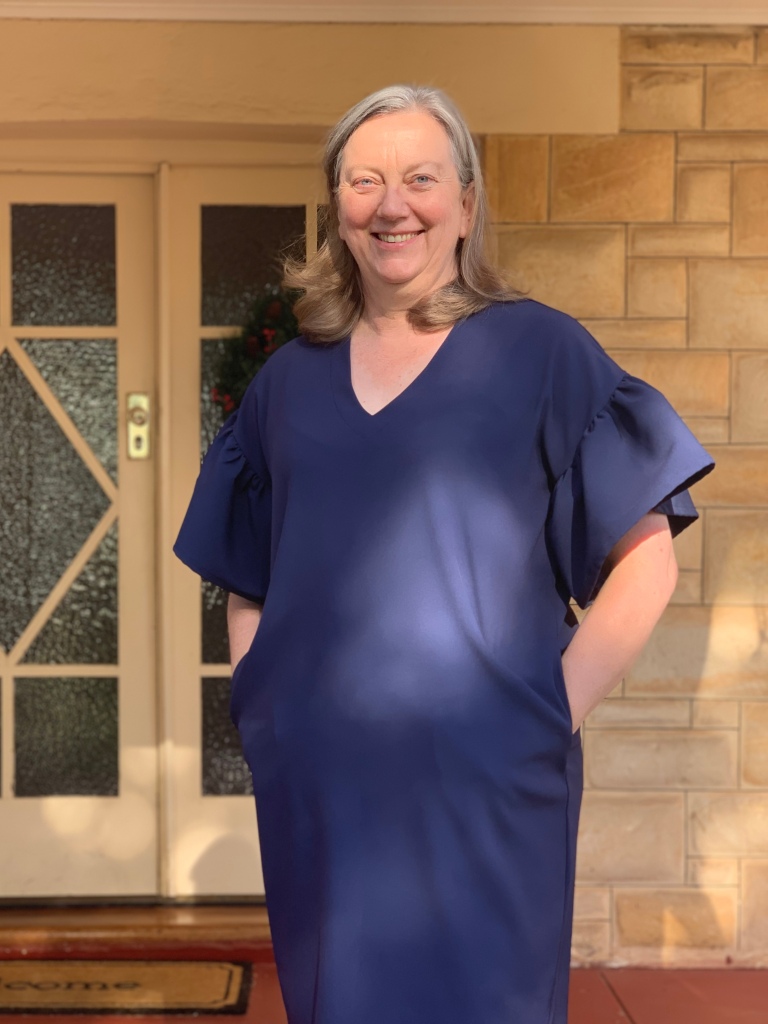
And yes it has pockets.

The fabric is a stretch triacetate suiting from The Fabric Store which I’ve used before and is perfect for corporate wear – some stretch and doesn’t crease.

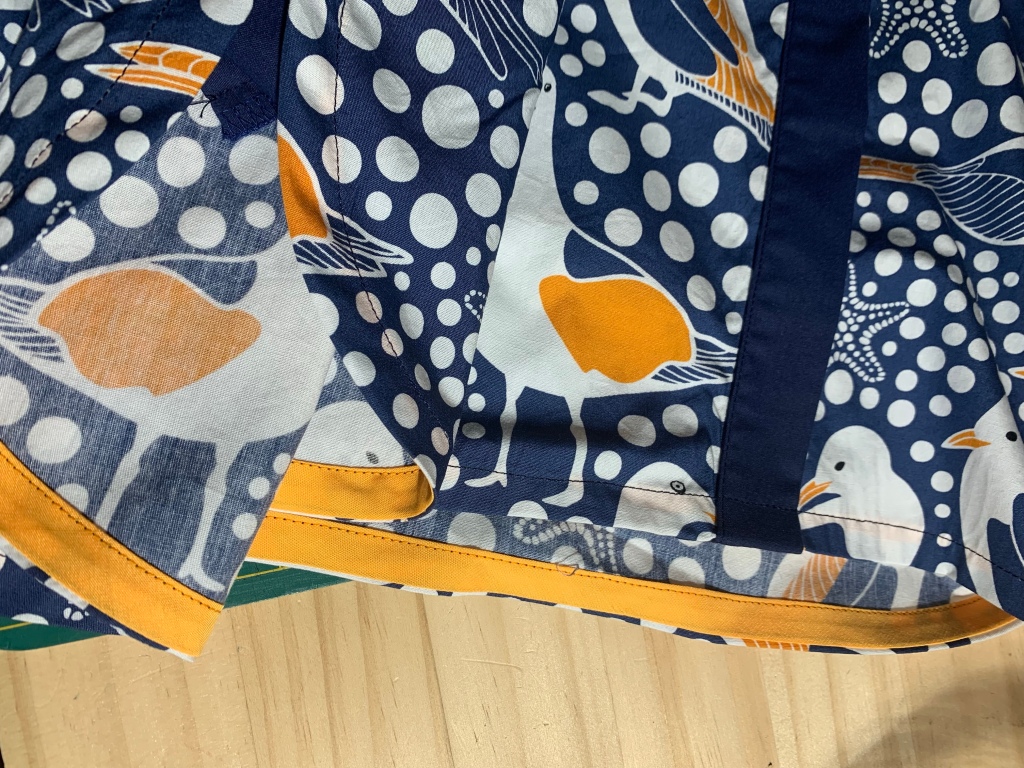
The “sleeves” are 19cm by 90cm rectangles. Which means the gathering was about twice the length of the extended shoulder/armscye.

I used a fun fabric for the facings of this one too. This was from one of the previous @adelaidesewcialclub fabric swaps. Thanks to whoever donated it!

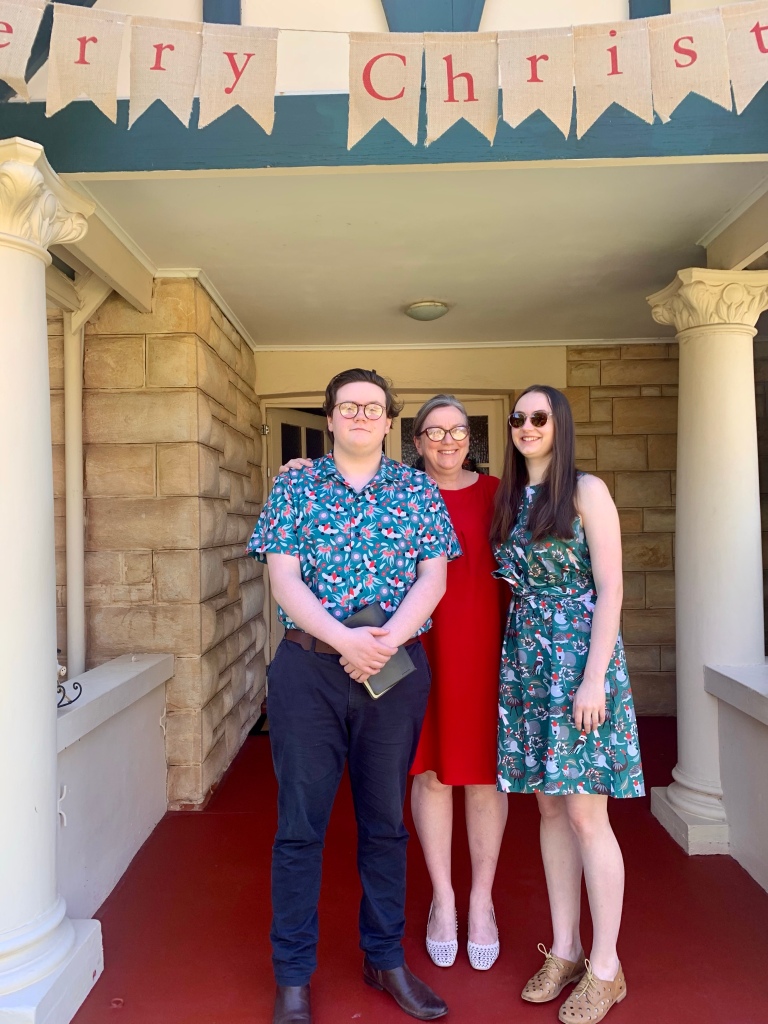
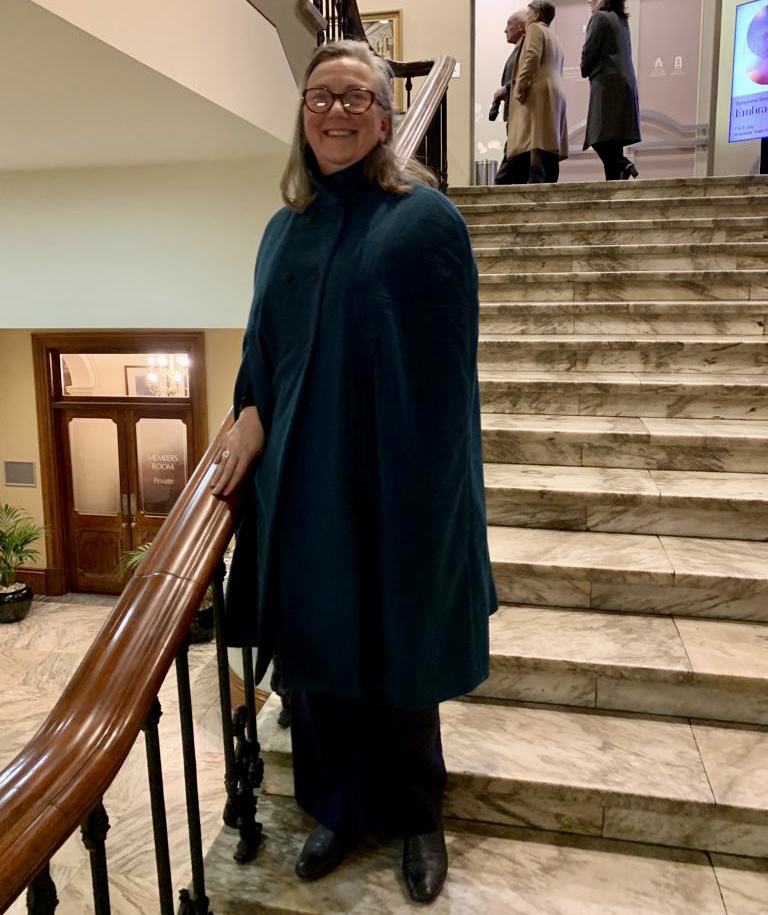
The red one with balloon sleeves

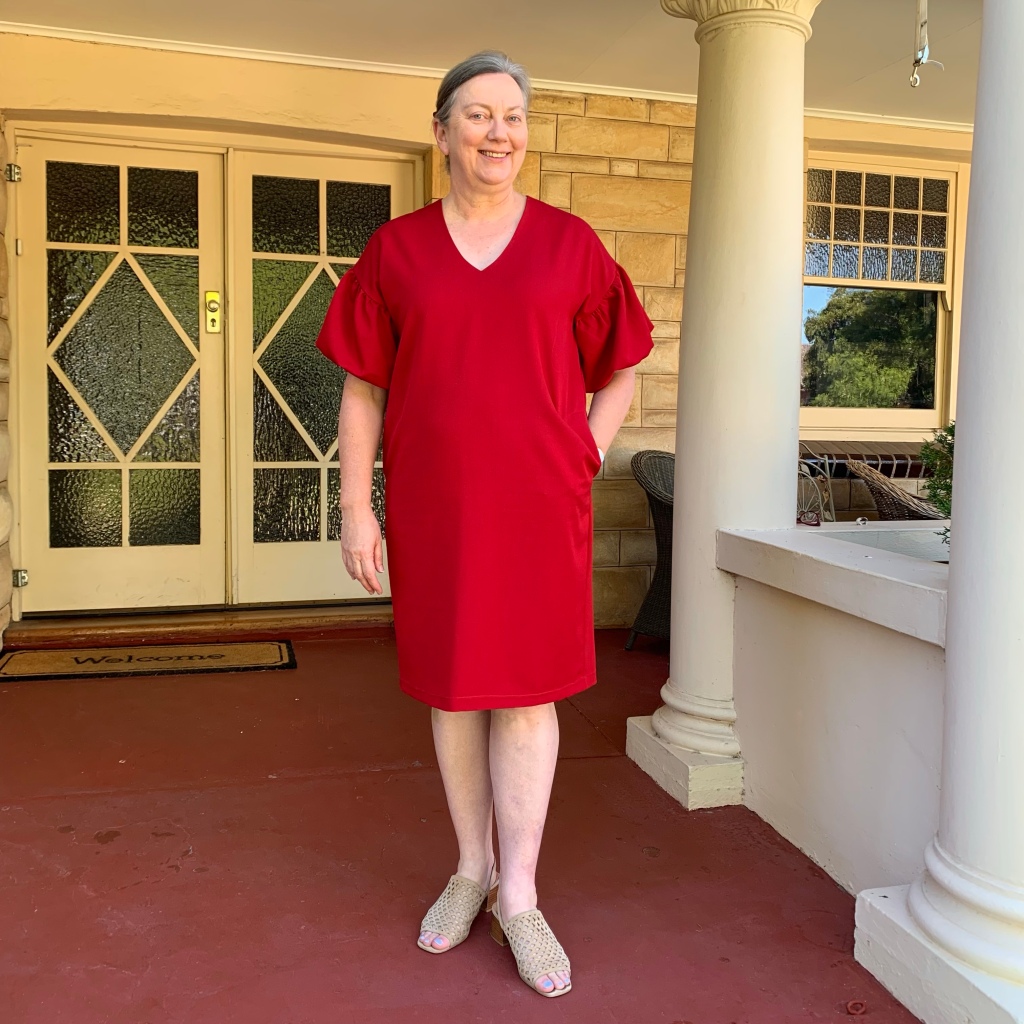
Continuing my sleeve experiments, I incorporated a sleeve stay into this version.

The sleeve was again a rectangle – 70cm x 24cm – a bit less to gather in than the navy ones but deeper. Fabric restrictions dictated the size.

The stay was shaped so that the top was similar to the armscye shape (about 45cm wide), the bottom (where the outer sleeve was gathered back into) was smaller (35cm), the overall height about 5cm less than the outer sleeve and the sides 5cm shorter than the centre.

I wanted to see if this might sit on my arm better.

I’m not sure if it made much difference but it was fun pretending to be a pattern maker!

Pretending is the right word, because adding ‘sleeves’ to this pattern makes the draglines to the bust a bit more obvious, as you can see above.

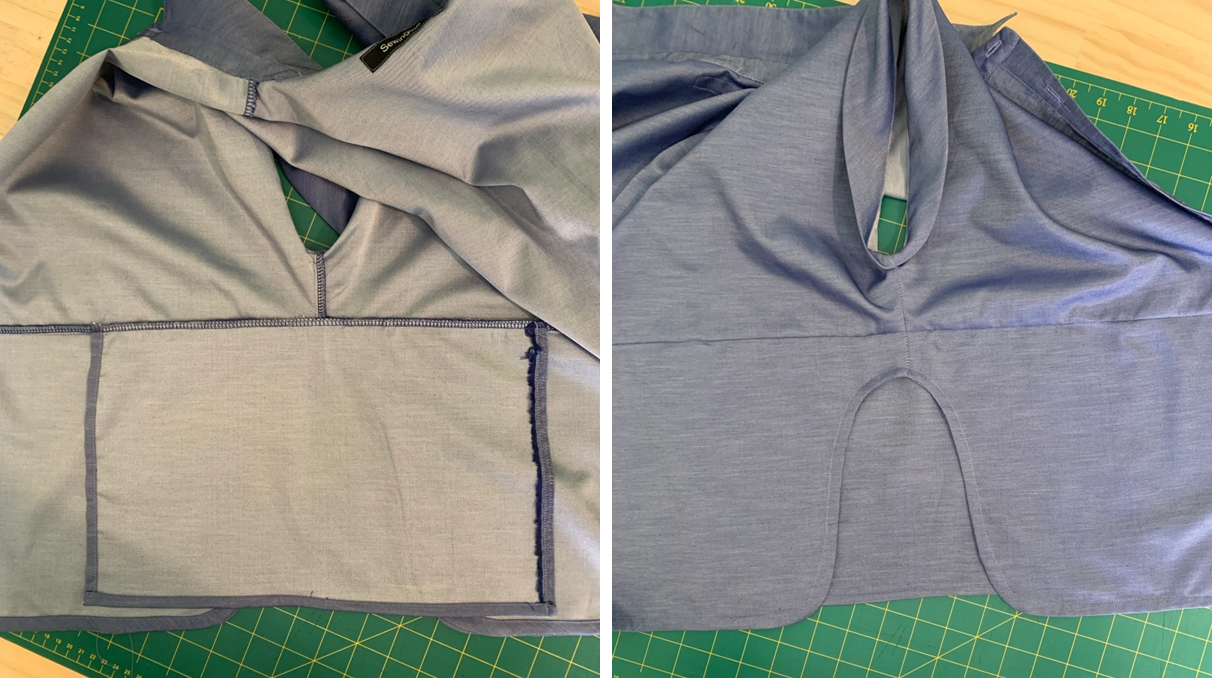
This version also has pockets. For all of these dresses I made the pockets with an 8cm wide strip of the outer fabric and then the rest in lining or some other woven fabric. This was mainly because I didn’t have enough fabric for full pockets and sometimes because this makes the pockets less thick.

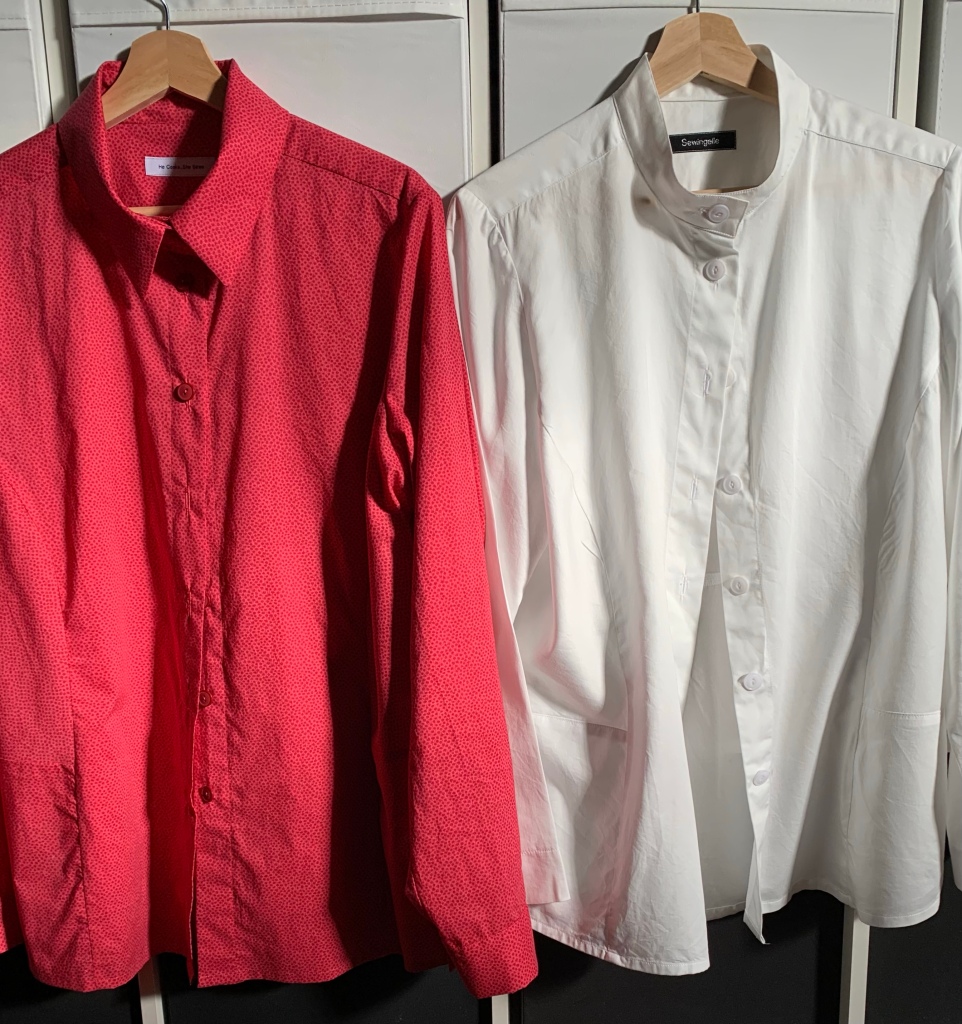
The fabric for this red dress was from emmaonesock and is an RPL stretch garbardine in Valentino red. Another great fabric for corporate wear – crease resistant and easy care. I also have a jacket in this fabric. Probably won’t be wearing them together because of those sleeves!

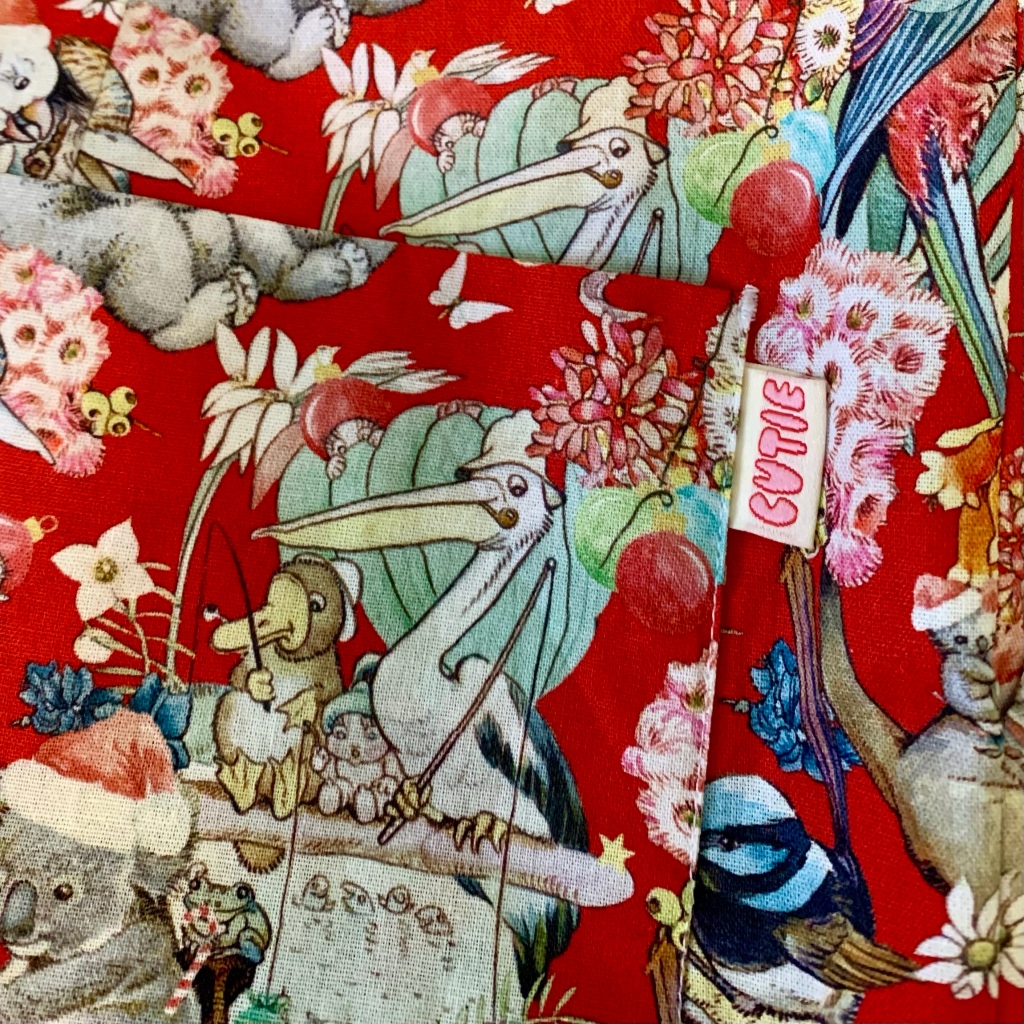
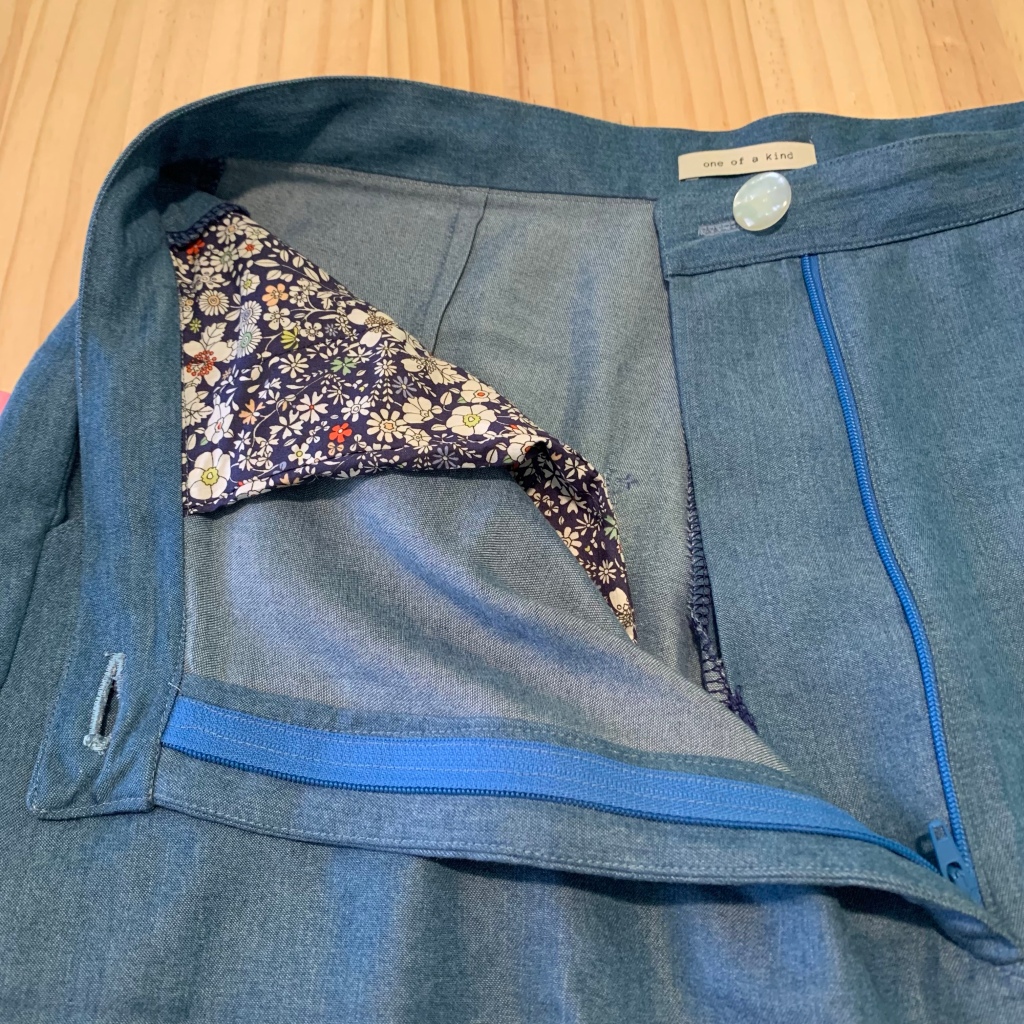
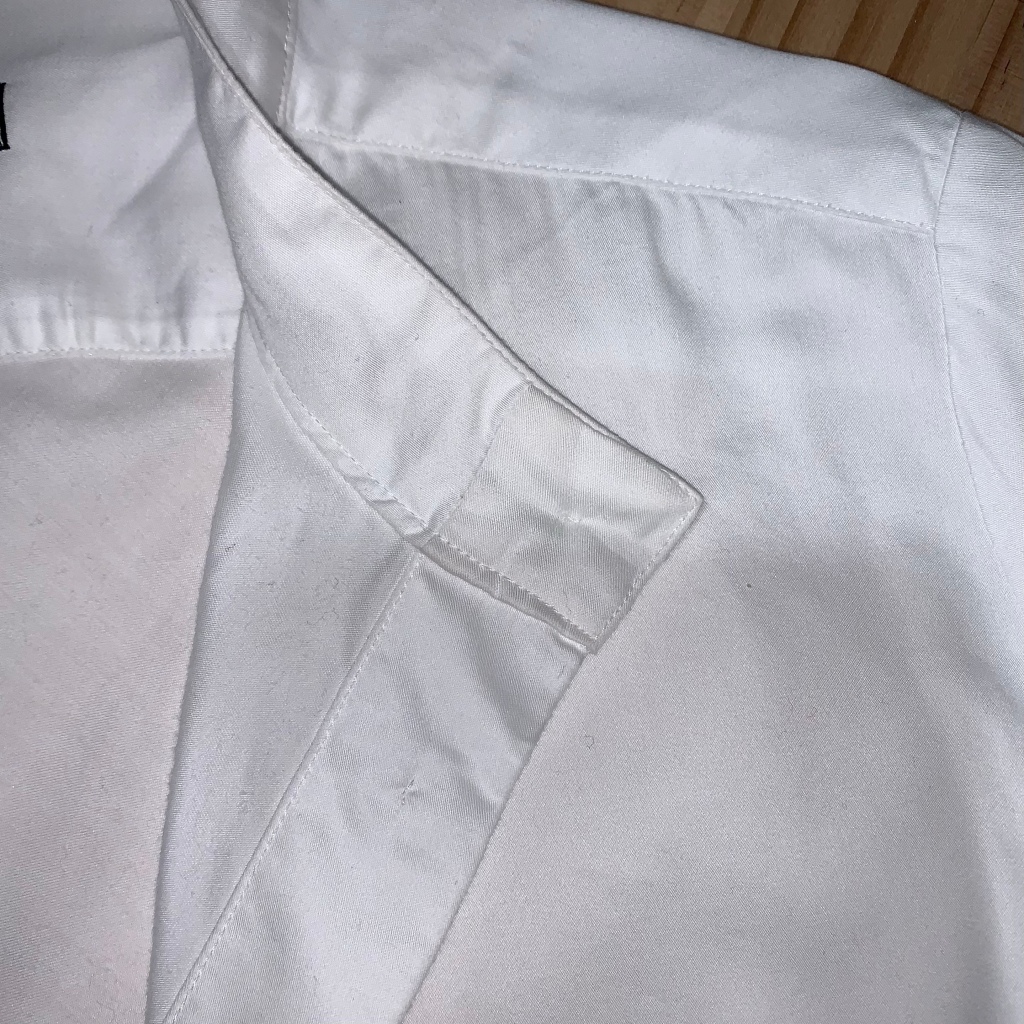
I faced the neck of this dress with a Liberty remnant and lined it with stretch lining. It’s particularly lovely to wear.

It wasn’t particularly lovely to put the lining in though, because it was an afterthought and there was a lot of finagling to get it to work! Hence the slightly wonky facing/lining seam above.

There’s a lot to be thankful about well drafted patterns and well written instructions. But I have to say that my pattern hacking was enjoyable and I’m happy with the results. What more could a sewist ask?

Sewing on repeat for Felicity: Butterick 6677

Repeating patterns is not boring when the fabric is fun. And almost irresistible when your daughter loves the pattern so much.

So that’s my reason for making this pattern 5 times…..

The last two iterations of B6677 for Felicity are both full length, one with the flounces on the bodice and the other hacked to have short sleeves. Both are size 14 with an FBA. And in the theme of keeping up to date with blogging my sewing projects, one of them has been waiting two years to appear on the blog….

Felicity really loves this pattern.

The older one is made from a crepe viscose from The Fabric Store. It has a print of stamped red stars on an ivory background, lovely drape and a subtle texture. Gorgeous fabric!

When I’ve made this pattern previously I’ve faced the flounces on the bodice because the wrong side can show. But I didn’t do that this time. I didn’t want to add bulk to this fabric and lose the fluidity of the fabric.

I made a narrow hem on the flounce edge, and overlocked the other edge before stitching the flounce to the bodice, flipping to the right side and then topstitching.

It worked out well, even though the wrong side does show a bit.

The second one is much more recent. It was sewn this January. Fabric bought on impulse. You may know how this happens. Went into the fabric store to buy thread, came out with thread and two lengths of fabric. This was one of them.

It’s an Ellie Whitaker print – zebrato – on poplin. So joyful and bright!

B6677 does not come with short sleeves so I borrowed some from another Butterick pattern I had in my stash – Butterick 6765. The armscyes were similar enough that I thought it would probably work. It did!

I didn’t have quite enough fabric to properly pattern match the very large pattern repeat of this print but I’m happy with how it turned out. Having more fabric would’ve mainly improved the bottom frill at the front. And I’m pretty sure I’m the only one how would even think about this!

The back and the front are opposite in terms where the two parts of the print are situated- the back cycles through blue at the neck to orange to blue on the frill at the bottom, the front from orange at the neck to blue to orange at the frill.

This means the print across the side seams is not at all congruous.

Again, something that having more fabric could’ve fixed. But also resulted in a lot more wastage!

I love both these dresses and so does Felicity!

11 cm – the difference between dowdy and fun: Cloud dress by Sewing Patterns by Masin

This is my second cloud dress. Absolutely love the first one. Quite like this one too!

This one is made with a soft furnishing cotton. I love the sweet horizontal rows of hearts.

The first sign of trouble was when I pulled a weft thread to square up the cut ends. The rows of hearts weren’t on grain. First thought was its inexpensive fabric, of course it’s printed off grain. But then I wasn’t sure. The horizontal rows of the print did seem to be at right angles to the selvedge and warp. Was my problem that the weft wasn’t at right angles to the warp? Is that even possible?

See how bad it is? The yellow line is on the weft

So, what to do? It’s not a tight weave so perhaps I could wash it again and try to pull it into shape whilst wet – all 4 metres of it and put up with the hearts not running straight across the fabric? Or ignore it and treat the rows of hearts, which were beautifully aligned at right angles to the warp, as if they were the weft.

You know how this turns out. I did the easy thing and ignored the out-of-square weft. It’s been washed and worn at least twice since without obvious twisting or warping. So, so far so good.

The initial version went on holidays

The second and major issue was the length. I cut out the tiers a little longer than drafted to line up with the rows of hearts. These are 3 cm apart so not a big change to what Masin drafted. You wouldn’t think it would make that much difference.

Yep still on holidays with the dowdy longer length. But look at the Apostles!

The only thing trying to make this dress fun was the heart print. The length had to go!

I fixed it by removing 11 cm in length overall – two 3 cm tucks at the bottom of the first tier and hemming another 5 cm shorter.

So much better!

The third problem was the sleeves.

I tried the dress on before I’d finished the sleeves. I thought they looked okay as bell sleeves. They do. As you can see in the images below.

But the dress overall looks much better when they are gathered back in.

Sleeves before and after

I simplified this improvement by inserting elastic into a casing rather than gathering onto a cuff. It was quicker and is also more comfortable to wear, particularly when reaching for things.

The other change I made was to move the buttons to the front and change to a scoop neck rather than a crew neck. I like this change.

With the deeper neck, the buttons aren’t needed to get in and out of this dress. But they are decorative. So decorative that I decided to continue them all the way down the front.

So I have an unnecessary button band on the bodice and a fake one on the skirt. I might remove the skirt ones.

Bottom line? Inexpensive furnishing fabric might have hidden challenges, shorter is more fun to wear and more fun to twirl in.

Smug? Or just pleased to have turned this dress into fun? Perhaps a bit of both!

Novelty print Christmas shirts: Newlook 6197

Nothing wrong with posting Christmas themed sewing in January, is there? – I meant it when I said I’m committed to document my projects better!

This post is about Christmas garments I made in Christmas 2022. They did get worn again just a few weeks ago, for Christmas 2023, so at least one of the photos is not ancient…

Felicity’s dress in the photo above is from Christmas 2021 (!) and has already been blogged (phew!).

Rory is modelling one of Christmas 2022’s efforts - shirts from Newlook 6197. All fabrics are cotton prints from Spotlight – my local bricks and mortar fabric store.

Rory’s fabric is a Jocelyn Proust print of platypuses (platypi?) and gum blossoms

For the record, he doesn’t like the camp collar – he’d prefer a collar and stand. He told me this last year. I haven’t made another shirt for him yet…

Felicity doesn’t mind the camp collar but found the shirt a bit loose through the waist. It would make a great PJ top.

Her fabric is a May Gibbs Christmas mashup print and is very cute.

I added a contrast inner yoke to both the shirts. Because I could!

I love those cute buttons and that pattern matching across the front was fun and satisfying to achieve! And was replicated on one side seam but not the other. Hence the ‘perfectly imperfect’ label was again appropriate.

I also made matching shorts. But not sensible elastic waist PJ shorts. Proper waistband and fly Closet Core Jenny shorts. With front and back pockets. Because Felicity wanted a matching set for day wear. Not sleepwear. I still think the ‘set’ looks like sleepwear..

The fly turned out okay on these so they got a ‘cutie’ label rather than ‘perfectly imperfect’.

At this point the amount of fabric left meant the back pockets didn’t pattern match. So perhaps that other label was warranted!

And finally, video of the matching set in action, this Christmas.

I like this Newlook pattern and I’m a bit disappointed both Rory and Chris have taken a dislike to camp collars. Oh well. Back to selfish sewing!

Felicity travelling pants: Closet Core Jenny and BurdaStyle 05/2022 #113

Happy New Year!

One of my new year resolutions is to get more of my sewing projects onto the blog, and in a more timely manner. This one is about one of the oldest projects – its been a long time coming!

Back in August 2022, Felicity went to Europe with one of her lovely friends. I made her two pairs of trousers. They appear in photos taken at the airport. As nice as this is, it doesn’t show much of interest to sewists!

She did send me a photo of the other pair on location – at Edinburgh Castle.

Proper photos of both to share the sewing details on a blog, however, have been sadly missing.

Until now.

My favourite is BurdaStyle 05/2022 #113

Why? Because of that glorious yellow floral print linen and the paper bag waist

These are a size 40 and the fabric is from The Fabric Store – an online purchase in January 2019 according to my fabric label (yay for sewing from stash!).

I doubled the width of the belt and used Liz Haywood’s Dressmaker’s Companion sewing book (this is not an affiliate link!) to help me with the fly construction. It still required some finagling.

I also added back pockets. I used the pockets from the Jenny trousers. Possibly placed a bit low. Two reasons that perfectly imperfect label is appropriate!

Bottom line (ha, see what I did there?!) is that they’re cute and I love them and I love her.

Her favourite would have to be the Jenny trousers. They have been worn a lot since August 2022. Partly because of the fabric. It’s a gorgeous soft tencel from Spotlight, my local bricks and mortar fabric store. I have a shirt dress made in another colour way of this fabric and I wear it all the time too.

The Jenny trousers are such favourites that they went on another trip to Europe about 12 months later, in September this year just past.

These are a size 12 with the waist altered after construction to approximately a size 10. Not ideally altered because I took in 4 cm overall from the side and centre back seams but not the centre front. This was because I had already moved the zip to the centre front and made it into a fly (again using the excellent instructions in Liz Haywood’s book)

The length of Felicity’s Jenny trousers is sort of cropped, like View A. I cut them out full length then, after she tried them on, removed 12 cm and folded up another 12 cm into the hem. They have a lovely deep substantial double fold 6 cm hem now.

I used a remnant of Liberty tana lawn (June’s Meadow in navy) for the front slash pockets. They’re “inside out” as instructed by Closet Core. They do look good from the inside!

There are back pockets too.

Another perfectly imperfect label because my front fly construction skills are still under development.

She really does love these trousers!

Seagulls! Style Arc Blair shirt dress and top

I love a good shirt dress. And I’m always interested in new shirt dress patterns. Hence trying the new to me Style Arc Blair shirt dress. Especially when I have fun fabric with seagulls on it!

The Blair shirt dress has very interesting pockets (spoiler alert they’re actually a bit dumb – more on that later) and I like the way stripes are used in the pattern drawing for the shirt.

Reviews suggested it’s a bit oversized.

They were right. It is generously sized. The crispness of my cotton poplin fabric is not helping this impression!

So. Those pockets. One of the reviews described them as granny’s peg bags. They are not wrong! This is me reaching to the bottom of them – a bit ridiculous.

The length of the pocket is designed so the bottom shows where the front shirt tail meets the back – as you can probably see below because I made the pockets in a plain navy fabric.

Not much of the pocket shows. But the bottom is almost at my knees. Which does not work well as an actual pocket! An easy fix though – I stitched the pocket bag together about 8 cms up from the bottom. Now much more functional!

Yes that is orange bias on the hem. What can I say apart from it was in the stash and it’s a good match!

It did make me think about what colour thread to use – orange or navy? Or orange and navy? Yep. That’s what I did – navy in the bobbin on the seagull side and orange as the top thread on the bias side.

Keeping with the orange highlighting – this dress also has orange buttons sewn on with orange thread. Making the navy button stand really pop!

The instructions for the sleeve cuffs are a bit confusing (Style Arc instructions are sparse). It wasn’t until I tried the dress on that I realised they were supposed to be turned back.

They’re cute but a bit of a fiddle to construct. I think you could simply omit them altogether and it would still look fine.

Bottom line for this pattern? It’s okay, but not great.

I like the idea of a top with the stripes in different directions. So I trialed that too, in a plain fabric first.

The bottom part of the top is double layered – because the high point of the shirt tail is quite high. Exactly how high was my question so I made it up initially without the extra layer.

It was quite high! There was a lot more of my torso on show than I liked.

Some retro fitting of an underlay was required.

It would’ve been easier to just follow the instructions and make it double layered from the start, but this also works.

The fabric was a souvenir cotton shirting bought in Italy at least ten years ago. It has a lovely sheen and the wrong side is a beautiful silver.

My buttons are a nod to that silver.

I like the top, mainly because the fabric is gorgeous.

My thoughts on the pattern as a top though – the style is a bit too boxy and the need for an underlay is annoying.

I’ll definitely be wearing both of these garments (love both the fabrics) but I am not planning a third version of this pattern.

Another cocktail frock – a mustard yellow Vogue 1723

Vogue 1723 is fast turning into my favourite pattern for party frocks.

I had a gala dinner to attend for a professional society well known for its yellow logo. And a yellow IKEA Nattjasmin sheet in just the right shade. How could I not make a cocktail frock out of it?

Don’t believe me about how perfect the colour was? Well. Look at this group photo on the night- you can hardly see me against the backdrop!

Much of the sewing was done on a long weekend in October at a fabulous Airbnb house at Encounter bay with a fabulous view and even more fabulous people!

I made a few changes/ hacked the pattern a bit for this version

The main hack was to omit the neck tie and move the neck slit to the centre front. Some Pinterest surfing inspired me to add a small frill to the neckline. But instead of being sensible and drafting a collar stand to put the frill on. I added an outside facing instead. And then did the same down the centre front seam but without a frill. Clear as mud? (how do people write good technical instructions?!). Better show you a photo!

The other change was to add a mustard lace to the sleeves. Which is less simple than it sounds because these very pouffy sleeves have a stay.

I stitched the lace to the stay on very close to the seam joining the outer sleeve and the stay, then joined the sleeve and the stay together at the top and checked out how it looked.

And it looked fine, even without the lace being gathered. So that the way it stayed!

I added 5 cm to the length when I cut the fabric out and used self bias for the hem (which is obvious from the mini hem draglines in the photos below taken after several hours of wearing – but also possibly there earlier on!)

I might add a bit more length for the next version – I’d be more comfortable with my knees a bit less on show..)

Obligatory twirl video!

Overall this has been a successful make which I have already worn again, twice. Once at a daytime church event (where it was windy so it seemed a bit short) and the other time out to dinner with the handsome He who Cooks, where the length was just right.

Vogue 1723, you’re a winner!

Stokx shirts

I’m a big fan of Melinda Stokes of Stokx Patterns and her design ethic. It doesn’t hurt that’s she’s an Aussie in Berlin. But even without that I’d still like her work.

I’m particularly drawn to her use of bias to improve wearing ease in structured woven garments. So my first foray was with her Eve and Evelyn shirt patterns. They have the upper back and upper side fronts cut on the bias. She’s now added all sorts of additional improvements. But I digress.

I made a size 6 Eve top and I used an IKEA Nattjasmin sheet for my first version. You’re wondering why aren’t you. And it’s a fair question. I initially bought the sheets as lining. But they are actually quite lovely despite being easily creased looking!

The fabric is a cotton lyocell blend and has a soft sheen. If the pattern worked out for me it would fill a white shirt gap in my wardrobe. And then I would repeat it with a Liberty lawn and have two lovely shirts.

You know how this goes don’t you? Lots of sewing plans. Usually they don’t work out. This time they did.

I don’t seem to have good photos of me wearing the white one. But believe me. I have.

I particularly like the way the collar stand is designed.

I hope I’m not giving away design secrets here. But the outer stand is bigger than the inner. And wraps around to line up with the inner edge of the button band. Sorry, not sorry, for the less than perfect sewing here – this was a trial version!

For this first version I included the split lower back/ vent.

It’s a bit odd on a light weight shirt but would be perfect in a heavier weight jacket.

The white one got the plain no cuff sleeves style from the sister Evelyn shirt pattern

I didn’t add the patch pockets. The vent was already going too far into jacket territory!

It’s very nice to wear. Design genius but also nice fabric. So I went ahead with my plans and made another one!

I added a regular collar to the stand collar to give it a more regular shirt look. I didn’t draft the collar -just used one from a Burda pattern I’d used recently. It was almost a perfect fit. All I had to add was about 5 mm length – which I added to the middle of it – to get the collar edge to the right spot for when its buttoned up.

I cut the lower back on the fold – no pleat – but angled out the centre back on the fold so that there was an extra 2 cm at the base tapering to zero at the top of the pattern piece. Just in case that vent was adding to the wearing ease.

It could be a bit big across the upper back?

And drag lines from the bust? What do they mean again? I didn’t adjust the pattern for a short waist with my usual “take 2 cm out above the bust point”. Perhaps that this issue? Perfecting fit is hard!

I interfaced the collar and cuffs with a very light weight interfacing. Could’ve been for knits. I really should sort out and label my interfacing stash better.

And, just in case you’re in any doubt – I am very happy with these shirts!

A yellow coat and lace dress for Adelaide Frocktails 2023

All frocked up and ready to go!

Yellow coat

Making this coat is a saga that goes back a few years.

It includes beautiful fabric that was almost too precious to use, trialing a dress pattern and a coat pattern and then, finally, last year, having the opportunity, need and courage to cut into this beautiful fabric.

I wore it to yellow themed gala dinner and felt fabulous. No photos except the one above which is not useful or flattering. But yellow!

So I definitely took photos before it’s next ‘wearing’. Which was Adelaide Frocktails, almost a year after the previous event (note to self: I need more events to wear a fancy yellow coat to!)

The outer fabric is a linen silk blend from JannsFabrics, a lovely IRL friend with a Etsy outlet for her fabric stash. It has the most glorious sheen.

The coat is lined with a yellow rayon from Spotlight and the pockets and undercollar are in a linen upholstery fabric.

The under collar shown very clearly here in the above photographic record of a brave hand-sewing session with red wine. Luckily, no wine was split!

What I was hand-sewing. These giant snaps came from The Button Bar – an amazing bricks and mortar store in Adelaide.

Another hand-sewing session for the hem. This photo also shows the beautiful yellow of the lining. Looking particularly vibrant in the late afternoon sun on the front verandah.

The pattern is BurdaStyle 03/2010#101, drafted out to a size 46.

It’s available as a downloadable PDF in sizes 36-44 from the German and Russian sites, but I can’t seem to navigate or find anything when I need to on the US or British sites. Given the rate Burda are repeating patterns, it may well appear in an upcoming issue. Ok, rant over.

Three point summary: Retro glamour, happiness-in-a-coat, swishy 🙂

Lace dress

I’ve had this lace and fabric for a long time and always wanted to put them together. Once I saw how well they also played with the yellow coat, they came out of the stash and into my wardrobe.

The main fabric is a silk wool woven from Gay Naffine’s designer deadstock fabric sales, the lace is DKNY deadstock that came my way via Liz’s designer fabrics (another great online shop for another sewist’s overabundant fabric collection, now sadly no longer active). I lined it with a soft pink bemsilk from Spotlight.

I like the clean finish you get with fusible interfacing when you sew it right sides together with the facing before fusing. And I sometimes even remember to do it!

This is the Style Arc Mila , in a size 16, hemmed 4 cm shorter than drafted.

I omitted the centre front seam – because I didn’t want to break up the lace with a seam. I straightened out the hem so that I could use the lace edge – the hem is ever so slightly curved down at the back on the pattern piece.

I sewed the centre back seam of the underlay and lace fabric separately and then sewed them together at the bodice joining seam. I bound the lace seam with some of the mesh from the lace selvedge.

I love my first version of this pattern, and a third version was sewn up just last weekend. The cocoon shape suits my apple figure well and it’s easy to wear.

It’s also a quick and easy sew, apart from the sharp right angle join at the centre front. But the instructions are great and a tiny amount of practice sets you up for success. The only negative aspect about this pattern is that there are no pockets.

My almost last words on this version of Mila? Comfortable elegance, with slight edge-i-ness from the inverted V of the bodice into the lace overlay. Also, love this dress!

And actual last words. Sob.

I have discovered a teeny tiny hole at the neck edge. Hidden under my hair on the night. But #sadface.

Will need to do something.. a couple of lace motifs?

Navy swishy coat: 08/2012 #142

I really love this jacket/coat and have worn it a lot this winter at work. But I seem to have very few good photos of it!

I feel bad saying it’s hard to photograph stuff in winter when I live in Adelaide in Australia and our winters are so mild. It’s not as if I leave for work in the dark and arrive home in the dark (well maybe, but I don’t leave in the dark!)

Anyway. Whatever. I only have bad photos of a garment I made and love. #sadface

Here’s a video in the morning before work

Here’s one in the airport toilets

High praise indeed if something is good to wear on a two hour flight and still looks good at the end of the day!

So this is Burda 08/2012 #142 and I made the longer version (B) in a size 48

The outer fabric is a fabulous polyester triacetate stretch woven and I lined it with a silvery light grey ‘Italian stretch lining’ – an acetate viscose elastane blend. Both from The Fabric Store. I didn’t have navy but I did have silver and red. I went for silver!

This pattern isn’t a lined style but I knew I would enjoy wearing it a lot more if it was lined. I also added modest shoulder pads to make it look a little bit smoother. I used a stretch interfacing on the neck band and facing. I didn’t interface the front or add a back stay #notpropertailoring.

I really like the neck band/lapel. Again no good photos. sorry not sorry for outlining them in red in the photo below. It’s an interesting detail and I want to show it to you!

I didn’t stitch the pocket bags to the outer fabric (although this is a good idea for an unlined coat). I used a floral cotton woven for what should have been the hidden part of the pockets. I’d also used this for lining a skirt yoke made in this same fabric so it’s a subtle reminder that they work together!

Also not so subtle given these are slash pockets. Lucky I’ve received more than one compliment on my interesting pockets!

This coat is a delight to wear. The stretch fabric makes it super comfortable. Navy is so useful for work. The lining lets it slide over whatever I’m wearing under it. It’s shape lends itself perfectly to swishing about. And the little collar neck band thingy gives it a tailored edge.

Black jacket: Vogue 1648

What sort of person looks at a pattern like this, totally designed for appliqué, and makes a plain black jacket?

Well. That would be me.

In my defense, it is a lovely simple style.

And, secondly, who wouldn’t make a wearable toile before they went to all the trouble of the appliqué? Not sure I’ll ever do all that appliqué, but it’s a plausible reason for what I did. Ahem.

Another mitigating factor was a remnant at Spotlight, my local bricks and mortar fabric store, of a heavyweight basket weave polyester in black with a lot of body in exactly the right length for this fabric. Well if you were doing appliqué like the pattern was designed for and your facings were a different fabric it was the right length. But at that point I hadn’t interrogated the pattern instructions enough to have worked that out. Once I got home and had paid attention, it was then a challenge!

A challenge I successfully met! All pieces cut out! Even the facings. I was lucky there was no nap or one way design. Pattern matching? What’s that when you’re limited by meterage?

I included the welt pockets. Totally mad in thick fabric like this! Plus the instructions did not mention interfacing any part of the welt or slit. It’s all on the bias! Madness.

And I blindly followed this. Because. Vogue instructions! Some part of my brain said just do what I’m told with Vogue. No need for all that thinking. They have great instructions. People learnt to sew just with Vogue instructions. The instructions will cover it all. It’s not a Burda magazine pattern. Blah blah. Turns out that was not good advice.

I used a remnant of Liberty tana lawn for the pockets bags. And then followed this theme through for the label.

I am not sure how long those pockets will hold up and I’m only putting very light things in them. I’m trying not to worry about it because I can’t change it now.

Thick fabric also meant that I was not brave enough for buttonholes and went jumbo square snaps instead.

I like the square snaps!

I also like the back pleat and the high-low hem.

The fit is good. This is a size 20 with the bust darts raised 2 cm. I’m short waisted. Upside of being short waisted is that my bust apex hasn’t migrated south due to age. Yet! Downside is also having a short neck.

Talking about short necks – the grown on funnel neck is a bit high at the front for my liking. It looked like it might be okay when I measured the pattern against another high neck jacket but the stiffness of this fabric means it gets annoying by the end of the day.

The issue is a bit exaggerated in the photo above because of the camera angle. But you see my point.

An easy fix, though, for the next version.

This is a great pattern. There will be a next version!

Oh and the black and brown tweed skirt in the first photos? That’s one I made a year or so ago, and longer, in precious souvenir fabric. I get so much more wear out of it since I shortened it to just on the knee!

Some things I’ve cooked this winter

As you know from the blog name, I don’t get to cook very often. So when I do and it turns out …. well that’s worth recording!

The first one surprised me. Why would a soup with swedes be nice? One of my least favourite vegetables. But it was an Ottolenghi recipe so I gave it a try.

The other two were both from an old issue of Australian Good Taste – July 2012 – its not just old issues of Burda magazines that are still used in this house!

Lamb biryani is a classic but I’d never made it before.

And red cabbage and pork in a slow cooker appealed – perfect food for winter that seemed easy and promised to be delicious – so I gave that recipe a try too.

All three are highly recommended – all easy, and all delicious!

Yotam Ottolenghi’s chickpea, carrot and swede soup with herby olives

Prep 10 min
Cook 25 min
Serves 4-6

  • 2 onions, peeled and finely chopped (300g)
  • 4 garlic cloves, peeled and crushed
  • 1 t cumin seeds
  • 2 T rose harissa
  • 2 t tomato paste
  • 1 cinnamon stick
  • Fine sea salt
  • 60ml olive oil
  • 2 x 400g tins chickpeas
  • ½ swede, peeled and cut into 2cm dice (200g)
  • 2 carrots, peeled, cut in half lengthways and then into 3cm lengths (200g)
  • 10g parsley leaves
  • 10g coriander leaves
  • 40g pitted green olives
  • 4 tsp apple cider vinegar

Put the first six ingredients in a large saucepan with two teaspoons of salt and 45ml oil, then cook on a medium-high heat for five minutes, until the onions are translucent. Add the chickpeas and their liquid and 800ml water, bring to a boil, then add the swede and carrot. Lower the heat, simmer gently for 15 minutes, until the vegetables have softened but still retain their shape, then take off the heat and remove and discard the cinnamon stick.

While the soup is cooking, put the herbs, olives and vinegar in the small bowl of a food processor, add the remaining two tablespoons of olive oil and pulse to a rough paste.

To serve, divide the soup between shallow bowls and spoon the olive mixture on top.

What I liked about this soup: the swede is not overpowering but just adds interest to the general vegetable-ness of the soup, none of the vegetables are overcooked and mushy, the spicing is excellent and the herby-olivey-vinaigrette adds savoury notes, depth and colour. And its gluten free and vegan. Always good to have some vegan recipes up your sleeve.

Lamb biryani

Prep 45 min
Cook 3 hours 25 min
Serves 6

  • 1 T olive oil
  • 3 large brown onions, halved, thinly sliced
  • 1.2kg lamb leg, boned, cut into 4cm pieces
  • 3cm-piece fresh ginger, finely grated
  • 4 garlic cloves, finely chopped
  • 2 long fresh green chillies
  • 8 cardamom pods, bruised
  • 1 cinnamon stick
  • 3 t cumin seeds
  • 1 t garam masala
  • ½ t ground cloves
  • 260g (1 cup) Greek yoghurt
  • 375ml chicken stock
  • 1 cup chopped fresh mint
  • 1 cup chopped fresh coriander
  • 500g basmati rice
  • 2 T milk
  • ½ t saffron threads
  • 2 large tomatoes, coarsely chopped (I used cherry tomatoes chopped in half)
  • 40g (½ cup) slivered almonds, toasted (I forgot to toast them)
  • 50g (¼ cup) sultanas (I used currants)

Cook onion in oil in a saucepan over medium heat for 10-15 minutes or until golden. Transfer to a bowl.

Brown lamb for 2-4 minutes. Transfer to a bowl.

Stir ginger, garlic, chilli, cardamom, cinnamon, cumin, garam masala, cloves and two-thirds of onion in pan for 2-3 minutes. Season. Add lamb. Reduce heat to medium-low. Stir in yoghurt and cook for 5-10 minutes.

Add stock. Reduce heat to low and cover. Cook for 45 minutes. Uncover and increase heat to medium-low. Simmer for 1 hour, stirring often. Stir in half the mint and coriander. Cool.

Meanwhile, grease a 5cm-deep, 3.5L baking dish with oil. Cook the rice until almost tender. Combine the milk and saffron in a small bowl and infuse for 1-2 minutes.

Preheat oven to 180°C.

Combine half the rice and remaining mint and coriander in a bowl. Spread over base of dish. Top with lamb mixture. Combine milk mixture and remaining onion and rice in a bowl. Spread over lamb.

Cover with 2 layers of foil. Bake for 45 minutes. Remove foil. Bake for 15 minutes.

Sprinkle with tomato, almonds and raisins and .. enjoy!

What I liked about this: it has layers of subtle flavour – not overpoweringly spicy or one dimensional. It reheats well (yum – leftovers!), and can be pre-prepared (up to the putting in the oven step). This would be a great dish for a buffet.

Pork & red cabbage braised in spiced wine

Prep 20 min
Cook 8 to 9 hours (slow cooker)
Serves 6

  • 1 T olive oil
  • 1.6kg-piece pork scotch fillet, tied at 4cm intervals
  • 3 garlic cloves, coarsely chopped
  • 2 large fresh rosemary sprigs
  • 3 dried bay leaves
  • 3 whole star anise
  • 1 t fennel seeds, lightly crushed
  • 125ml (½ cup) red wine
  • 500ml (2 cups) chicken stock
  • 2 T light soy sauce
  • ½ (about 800g) red cabbage, cored, coarsely shredded
  • 2 T brown sugar
  • a handful of fresh parsley or some other green herb for garnish

Heat oil in a frypan over high heat. Season the pork. Cook, turning occasionally, for 8 minutes or until browned. Transfer to your slow cooker.

Reduce frypan heat to low. Stir in the garlic, rosemary, bay leaves, star anise and fennel seeds for 1-2 minutes or until aromatic. Stir in the wine for 1 minute, scraping the pan to dislodge any bits that have cooked onto the base. Increase heat to high, add stock and soy sauce and bring to the boil.

Pour over pork in the slow cooker, turn it on to low and come back after at least 6 hours. Stir in cabbage and sugar. Cook for another 2 hours or until cabbage is tender.

Remove string from pork and slice. Place cabbage and its delicious cooking juices on a platter, nestle the pork on top, sprinkle with parsley and serve with mashed potato. Plus the rest of that bottle of wine. Even better, enjoy in front of a fire!

What I liked about this dish: The mulled wine flavour spicing with the cabbage is delightful, red cabbage is always pretty, everything is so tender and the slow cooker does almost all of the work for you (although you do have to start early in the day!)

Back to normal sewing content soon!

Let me know if you try these recipes, what you thought of them, and of any improvements!

Houndstooth skirt but make it red and make it work: Burdastyle 04/2018 #126

This lovely wool fabric with a bit of stretch was from Jann’s destash Etsy site. And it was just enough for a pencil skirt. Or so I thought!

I prewashed it because a dry clean only garment doesn’t work for me unless it really is a ‘only wear once every two years’ sort of thing. Maybe washing it shrunk it a little in width?

Whatever, with a hip measurement of 116 cm, 1 metre long by 118 cm wide just wasn’t going to work.

Enter this pattern, which, despite being a faux wrap, seemed like it might work within my fabric constraints.

Image from BurdaStyle

Well, as it turned out, no, not as drafted, but yes, if I made all of the underlay in the other fabric.

So I proceeded with this pattern using a red ponte for the diagonal band and the underlay. I interfaced the ponte with a fusible stretch interfacing to give it a bit more body.

This pattern is a very wearable faux wrap style for corporate wear. Here I am at my desk at work – it doesn’t make me feel inappropriately exposed even whilst seated yet it’s an interesting and stylish detail

I also added a pocket. Those diagonal stitching lines from the yoke? They are just seams added for interest, not actual slash pockets. So I turned the right one into a pocket using the slash pocket piece from the jumpsuit in the same issue.

The yoke was interfaced with the same stretch interfacing and lined with a red and white cotton woven from the stash (with elephants on it…ridiculous choice.. you can see it in all its whimsical glory in the photo below – this was the skirt in a pile on my lap for hemming by hand whilst sitting on the sofa)

I lined the skirt with an Italian red stretch acetate lining from The Fabric Store. Lovely stuff! But I didn’t pay enough attention to the order of construction. So quite a bit of hand sewing had to be done to attach the front skirt lining to the yoke between the front skirt and underskirt. And that’s not where my macgyvering ends though.

Upon first trying it on it was clear that the waist was too loose. So I took it in 2 cm both sides of the centre back at the waist down to 1 cm at the yoke/ skirt joining seam then to nothing about 7 cm down. This means the centre back is now a lot more curved in than it should be. Which is obvious when your fabric is a houndstooth.

It was still a bit loose and meant the skirt sat below the waist. I was a bit over it at this stage so finished it off, hemmed it and put it in the wardrobe to check on wearability.

Every time I pulled it out to wear it I put it back in again. The length was wrong and the hip shaping was too low – giving me saddle bags I didn’t have (because it wasn’t sitting at my natural waist). I needed to lose about 4 cm from the waist.

My choices at this point were

1. Donate it

2. Unpick multiple seams and get the fit perfect

3. Add elastic to the back

Yep. You know what I did. I added elastic.

I didn’t even sandwich it between the outer and inner yoke. So slapdash. But not so obvious when you don’t tuck in. Or your tucked in top blouses out!

I had to resew on my label, so added a ‘perfectly imperfect’ one too. I swear I didn’t try and sew it on wonkily. But there it is. A double reminder not to let perfect be the enemy of done.

Curtains for Vogue 9237

Well upholstered. Inspired by Gone with the Wind. Or Sound of Music. So many potential headlines for this sewing project!

This project started life as a remnant of upholstery fabric. Just enough for a dress. Gorgeous colours. Great print. Nice texture. Last few metres on the roll. On sale. Caught my eye as I walked past the furnishing fabrics section. How could I resist!

I initially intended to make a simple shift dress. But wasn’t happy with my last attempt at a larger size of my go to pattern so was worried it wouldn’t work out. Because it’s such precious fabric. Eyeroll.

The fabric drapes well so it could work for Vogue 9237 I told myself.

I knew I’d need to lengthen the sleeves because it’s an unbreathable synthetic fabric that I’m only ever going to wear in cool weather. According to the pattern envelope I didn’t have quite enough meterage for making it in one fabric even with short sleeves. Challenge accepted!

I made it work! Even the back frill!

This is size XL and it’s too big through the shoulders. I unpicked the top half of the sleeves, trimmed the shoulder edges back 15 mm at the apex down to nothing at the sleeve notch and then reinserted the sleeve. It’s still a bit big. My first version is a bit too big too but I thought that was because it was a crepe with a bit of mechanical stretch. Seems that it was just because the thinner fabric makes it less obvious.

Coloured tights. You can take the girl out of the 80s but you can’t take the 80s out of the girl

Emerald green cape: BurdaStyle 10/2012 #140

I have always wanted a cape. Always. Ever since I can remember.

Once I started sewing again about 20 years ago I used to dream about making a cape most winters. But never got to actually doing anything about it before spring came and all thoughts of heavy winter clothes fly out the window.

But this winter I broke the spell!

How, you might ask?

Part of it was intentionally buying fabric for a cape. In summer. As you do. Particularly when The Fabric Store has deadstock fabric that would make a great cape and it’s an excellent price.

Another part was already having enough other winter coats and clothes in general. A frivolous thing like a cape was finally at the top of the to-sew list.

I wanted a tailored cape style. My extensive Burda magazine collection, as usual, gave me several options. After several virtual sewing sessions I settled on 10/2012 #140

The fabric is a light weight wool nylon blend. It has nice drape and a slightly brushed look on the face side. Once I’d had a good look at it I didn’t particularly like this side – it’s a bit reminiscent of cheap coating or fleece – so I used the other more regular plain weave side as the right side.

Now I’ve made it up I’m a bit disappointed with the fabric – it creases easily and I suspect it might pill. But I can’t imagine I’ll be wearing a cape on a daily basis so I expect I’ll be able to swish around in this cape for several winters to come!

It also looks like the buttons aren’t lined up – I must go back and check that its not just photography trickery. Ahh, the benefits of blog photos – they reveal things you don’t notice in the mirror. I also haven’t yet sewn on a snap fastener to the collar and I really should.

I used a polyester crazy paisley print for the lining and love how it looks with the silvery bias I used on the hem. I also love how it looks with my label.

The design calls for decorative hand stitching to highlight the seams. Not gonna lie – that much hand stitching , and hand stitching on show, is defiantly not my cup of tea. I used a triple machine stitch instead. And hundreds of metres of thread!

I interfaced more than Burda suggested because I also interfaced the yoke/ top front and back of the cape.

I cut out the interfacing about 5 mm smaller than the outer fabric. After fusing I overlocked all the edges.

The only seam I adjusted was the shoulder – just curved it in slightly more over the shoulder point after I tried the cape on.

It’s first outing was on my birthday – all the family went to the Adelaide Town Hall for a concert I wanted to go to by the Adelaide Symphony Orchestra.

An appropriate event in which to swish around in a cape in! And yes, I can fit a small crossbody handbag underneath my cape!

And talking about swishing… I have two silly videos – one with a smugness alert – to show you just that!

Mission accomplished. A cape is now in my wardrobe.