Seamwork Sonya

If you’ve followed my blog for a while you’ll know I’ve been a huge fan of Burda magazines.

Not so much any more. Change in editors, reissuing patterns from earlier issues, and less diversity in styles and size ranges have almost convinced me to give up my subscription.

So I’m trying a few other sources. Seamwork being one of them.

My first foray into Seamwork’s large online pattern library was at the end of last year. I chose the Sonya dress.

This design really appeals to me – the shape, opportunity for colour blocking or having fun with stripes. And those huge pockets!

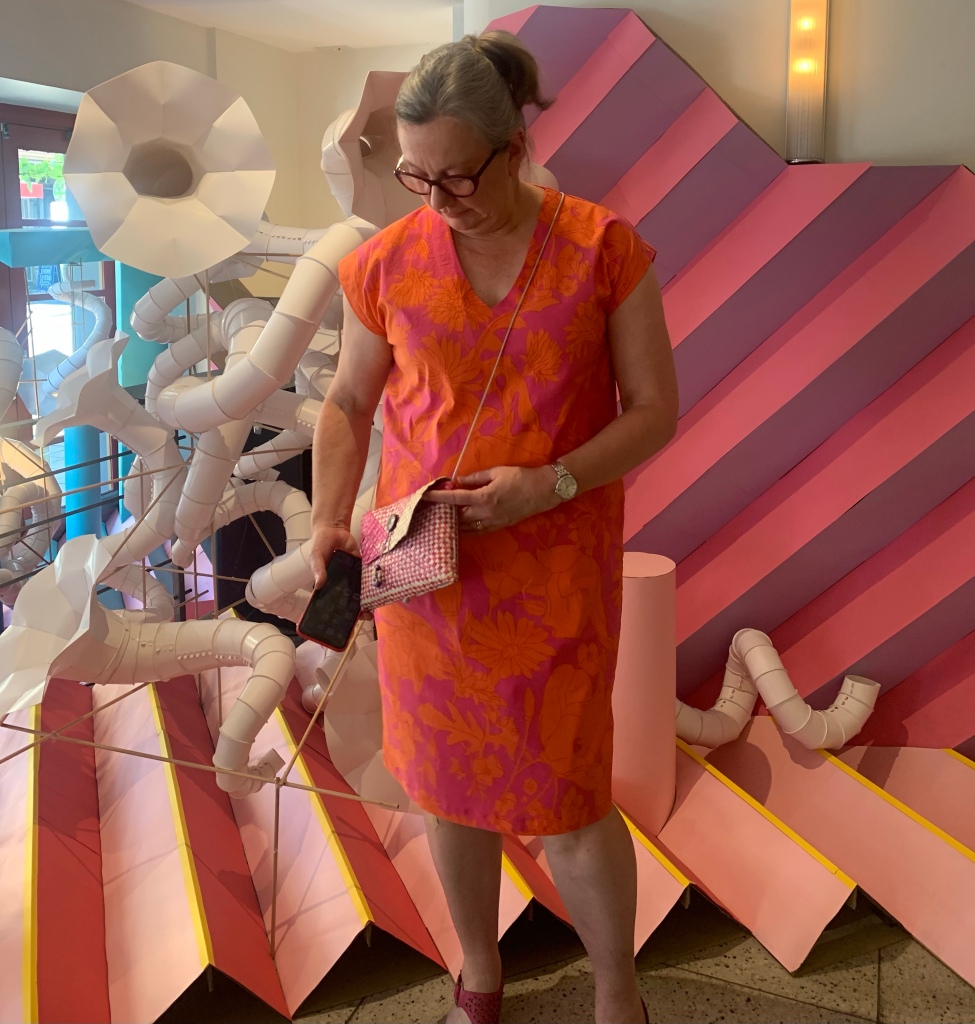
Sizing is always a bit of a guess when trying a new pattern company so I used something from my stash that I loved (obviously – otherwise it would not be in my stash!) but I’d found tricky to use for other patterns. It’s a very colourful First Nations patterned poplin.

I included the artists name from the selvedge as an inside label on the hem. Because acknowledgement is important

It turned out a bit loose through the bust and too long.

I didn’t like the pattern/fabric combination enough to go to the work of altering it properly. Should’ve made a shirt from this delightful fabric!

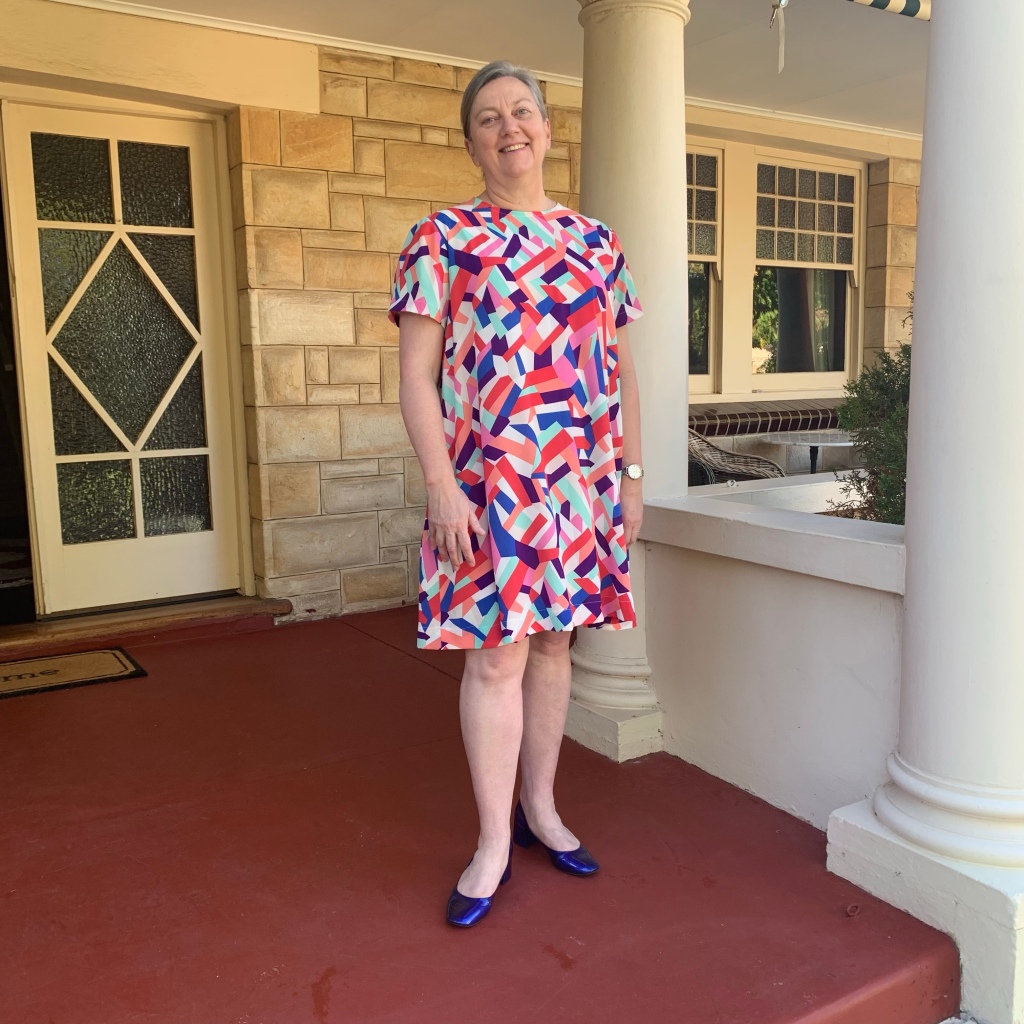
For my second version I used an embroidered light weight denim from my stash and sized down through the bust.

I topstitched the yoke and front panel seams using the lightning triple stretch stitch with red in the needle and black in the bobbin. I don’t expect this to create a somewhat uneven effect but it’s actually fine for this denim with its simple somewhat naive embroidery.

I made the dress slightly less straight up and down by adding a short piece of elastic to the hems at the sides. It’s a subtle difference but it works.

This was a much more successful garment than the first one. But, to be frank, not one I immediately loved. That could partly be because I styled it with green ballet flats…

And then, several months later I threw it in my suitcase at the last minute for a trip to Italy. Because I figured I could wear with a jumper underneath and boots and tights as well as on its own. Might come in handy I thought. Well. Did it ever!

Selfie in Venice

Fabric shopping in Florence

Wine tasting in Tuscany, with a scarf added for a little extra warmth

Museum visit in Rome with a raincoat and tights, but not cold enough for boots as well

Pre-photo primping over lunch – or so I thought!

This dress was one of my most worn makes on that trip. Why? Well, I think it’s because the fabric is cute, it’s a classic colour combination, it looks good with white sneakers (perhaps not so good with tights and white sneakers…but I was warm!) and the enormous pockets were gold when travelling.

Another reason for wearing a garment more than once before disposing of it.

Now I’m feeling bad about the first version!

More pattern repeats: True Bias Lodo dress

I love this pattern. I made it four times in quick succession when I first purchased it. And now this summer I’ve made it three more times over about 6 weeks.

It’s an excellent simple shape for stretch fabrics. Using a woven fabric to face the neck and grown on cap sleeves/extended shoulders is practical and also an opportunity to introduce some whimsy.

My versions are halfway in length between view A and B and this summer I made them in a size 18.

The orange and hot pink one

This is classic Lodo. The fabric does all the work. It’s a viscose nylon spandex woven stretch fabric from Spotlight, my local bricks and mortar store.

I added to the fun with a hot pink woven cotton for the facing, bound with yellow-orange bias binding.

It really is fun!

The navy version with ruffle sleeves

This was an experiment. What happens if I add gathered rectangles to the extended shoulders/grown on cap sleeves?

Will it make a corporate dress look interesting, but in a good and stylish way? Particularly if I use a very corporate-y navy fabric?

I think it has!

And yes it has pockets.

The fabric is a stretch triacetate suiting from The Fabric Store which I’ve used before and is perfect for corporate wear – some stretch and doesn’t crease.

The “sleeves” are 19cm by 90cm rectangles. Which means the gathering was about twice the length of the extended shoulder/armscye.

I used a fun fabric for the facings of this one too. This was from one of the previous @adelaidesewcialclub fabric swaps. Thanks to whoever donated it!

The red one with balloon sleeves

Continuing my sleeve experiments, I incorporated a sleeve stay into this version.

The sleeve was again a rectangle – 70cm x 24cm – a bit less to gather in than the navy ones but deeper. Fabric restrictions dictated the size.

The stay was shaped so that the top was similar to the armscye shape (about 45cm wide), the bottom (where the outer sleeve was gathered back into) was smaller (35cm), the overall height about 5cm less than the outer sleeve and the sides 5cm shorter than the centre.

I wanted to see if this might sit on my arm better.

I’m not sure if it made much difference but it was fun pretending to be a pattern maker!

Pretending is the right word, because adding ‘sleeves’ to this pattern makes the draglines to the bust a bit more obvious, as you can see above.

This version also has pockets. For all of these dresses I made the pockets with an 8cm wide strip of the outer fabric and then the rest in lining or some other woven fabric. This was mainly because I didn’t have enough fabric for full pockets and sometimes because this makes the pockets less thick.

The fabric for this red dress was from emmaonesock and is an RPL stretch garbardine in Valentino red. Another great fabric for corporate wear – crease resistant and easy care. I also have a jacket in this fabric. Probably won’t be wearing them together because of those sleeves!

I faced the neck of this dress with a Liberty remnant and lined it with stretch lining. It’s particularly lovely to wear.

It wasn’t particularly lovely to put the lining in though, because it was an afterthought and there was a lot of finagling to get it to work! Hence the slightly wonky facing/lining seam above.

There’s a lot to be thankful about well drafted patterns and well written instructions. But I have to say that my pattern hacking was enjoyable and I’m happy with the results. What more could a sewist ask?

11 cm – the difference between dowdy and fun: Cloud dress by Sewing Patterns by Masin

This is my second cloud dress. Absolutely love the first one. Quite like this one too!

This one is made with a soft furnishing cotton. I love the sweet horizontal rows of hearts.

The first sign of trouble was when I pulled a weft thread to square up the cut ends. The rows of hearts weren’t on grain. First thought was its inexpensive fabric, of course it’s printed off grain. But then I wasn’t sure. The horizontal rows of the print did seem to be at right angles to the selvedge and warp. Was my problem that the weft wasn’t at right angles to the warp? Is that even possible?

See how bad it is? The yellow line is on the weft

So, what to do? It’s not a tight weave so perhaps I could wash it again and try to pull it into shape whilst wet – all 4 metres of it and put up with the hearts not running straight across the fabric? Or ignore it and treat the rows of hearts, which were beautifully aligned at right angles to the warp, as if they were the weft.

You know how this turns out. I did the easy thing and ignored the out-of-square weft. It’s been washed and worn at least twice since without obvious twisting or warping. So, so far so good.

The initial version went on holidays

The second and major issue was the length. I cut out the tiers a little longer than drafted to line up with the rows of hearts. These are 3 cm apart so not a big change to what Masin drafted. You wouldn’t think it would make that much difference.

Yep still on holidays with the dowdy longer length. But look at the Apostles!

The only thing trying to make this dress fun was the heart print. The length had to go!

I fixed it by removing 11 cm in length overall – two 3 cm tucks at the bottom of the first tier and hemming another 5 cm shorter.

So much better!

The third problem was the sleeves.

I tried the dress on before I’d finished the sleeves. I thought they looked okay as bell sleeves. They do. As you can see in the images below.

But the dress overall looks much better when they are gathered back in.

Sleeves before and after

I simplified this improvement by inserting elastic into a casing rather than gathering onto a cuff. It was quicker and is also more comfortable to wear, particularly when reaching for things.

The other change I made was to move the buttons to the front and change to a scoop neck rather than a crew neck. I like this change.

With the deeper neck, the buttons aren’t needed to get in and out of this dress. But they are decorative. So decorative that I decided to continue them all the way down the front.

So I have an unnecessary button band on the bodice and a fake one on the skirt. I might remove the skirt ones.

Bottom line? Inexpensive furnishing fabric might have hidden challenges, shorter is more fun to wear and more fun to twirl in.

Smug? Or just pleased to have turned this dress into fun? Perhaps a bit of both!

Black jacket: Vogue 1648

What sort of person looks at a pattern like this, totally designed for appliqué, and makes a plain black jacket?

Well. That would be me.

In my defense, it is a lovely simple style.

And, secondly, who wouldn’t make a wearable toile before they went to all the trouble of the appliqué? Not sure I’ll ever do all that appliqué, but it’s a plausible reason for what I did. Ahem.

Another mitigating factor was a remnant at Spotlight, my local bricks and mortar fabric store, of a heavyweight basket weave polyester in black with a lot of body in exactly the right length for this fabric. Well if you were doing appliqué like the pattern was designed for and your facings were a different fabric it was the right length. But at that point I hadn’t interrogated the pattern instructions enough to have worked that out. Once I got home and had paid attention, it was then a challenge!

A challenge I successfully met! All pieces cut out! Even the facings. I was lucky there was no nap or one way design. Pattern matching? What’s that when you’re limited by meterage?

I included the welt pockets. Totally mad in thick fabric like this! Plus the instructions did not mention interfacing any part of the welt or slit. It’s all on the bias! Madness.

And I blindly followed this. Because. Vogue instructions! Some part of my brain said just do what I’m told with Vogue. No need for all that thinking. They have great instructions. People learnt to sew just with Vogue instructions. The instructions will cover it all. It’s not a Burda magazine pattern. Blah blah. Turns out that was not good advice.

I used a remnant of Liberty tana lawn for the pockets bags. And then followed this theme through for the label.

I am not sure how long those pockets will hold up and I’m only putting very light things in them. I’m trying not to worry about it because I can’t change it now.

Thick fabric also meant that I was not brave enough for buttonholes and went jumbo square snaps instead.

I like the square snaps!

I also like the back pleat and the high-low hem.

The fit is good. This is a size 20 with the bust darts raised 2 cm. I’m short waisted. Upside of being short waisted is that my bust apex hasn’t migrated south due to age. Yet! Downside is also having a short neck.

Talking about short necks – the grown on funnel neck is a bit high at the front for my liking. It looked like it might be okay when I measured the pattern against another high neck jacket but the stiffness of this fabric means it gets annoying by the end of the day.

The issue is a bit exaggerated in the photo above because of the camera angle. But you see my point.

An easy fix, though, for the next version.

This is a great pattern. There will be a next version!

Oh and the black and brown tweed skirt in the first photos? That’s one I made a year or so ago, and longer, in precious souvenir fabric. I get so much more wear out of it since I shortened it to just on the knee!

Batwing ‘houses’ dress: Stylearc Hedy

The 80s called and they want their batwing dress back.

No way. Nice try 80s, but I’m not giving this pattern up!

This is the Stylearc Hedy dress in size 16 made up in a stretch poly velvet from my stash but originally from EOS

It has pockets!
Back view

The fabric is a delight. The EOS description was ‘This is a gorgeous stretch velvet, lightweight with a liquid drape and luxuriously soft hand, a beautiful sheen and about 50% crosswise stretch.’ Beautifully put.

I used a regular machine stitch for most of the construction, despite it having a lot of stretch, then overlocked close to the stitch line. I figure that if the regular stitch breaks then the overlocking will hold it all together.

Yellow basting and the a double needle hem

The cut edges of the fabric tend to roll so I basted the hem close to the cut edge (yellow thread above) before hemming with a double needle.

I love this dress

I made a trial version in inexpensive synthetic panne stretch velvet from Spotlight – my fellow Australian sewists will know which fabric this is! Despite the nasty nature of the fabric I’ve also worn this dress much more than I should’ve. That tells me this pattern is a winner.

Bottom line: Glorious fabric and the loose shape make this dress perfect for going out to dinner in fancy restaurants. As captured above by my favourite dining companion – He who Cooks!

Jumping into winter: Stokx Patterns Hacker top

I’ve been intrigued by Stokx Patterns for a little while. Of course. Why wouldn’t I be. An Australian born Berlin resident designer for middle aged women.

What’s not to love? Like Burda but better.

A hoodie and a long skirt? Why not? ‘Styling’ this hoodie is all about adding a cozy layer to whatever I’m wearing, its not about trying to look good…

The @adelaidesewists challenge to ‘jump into winter’ was the nudge I needed to combine the Stokx hacker top and a burgundy knit in my stash.

Image from Stokx Patterns

It’s a bit of an odd fabric. Online purchase from EOS in 2018. Polyester and spandex in a micro quilted look with a striped reverse side. Just begging to be made into something in which the wrong side shows. But burgundy and camel..? Not my normal happy colours. Hence the long time in the stash.

The hood was a great way to take advantage of the reversible nature of this fabric. I debated whether to cover the overlocked seam in the hood with a coordinating bias stripe. But you can see that doing nothing won!

The back view of the hood plus bonus progress shot of growing into grey hair

I also used the reverse side of the fabric for the hood band and the cuffs

I made a size 6 with a 2cm petite adjustment above the bust dart (normal for me- I’m short waisted). This might have been one size too big – I took 4 cm of the sleeve length before sewing on the cuffs. It looks a bit big through the bust too. The hem flares out but this is a design feature intended by the designer- it doesn’t require the wearer to stand with their hands on their hips!

And the hem is wavy because I lazily turned it up and zigzagged rather doing a proper double needle hem. A bit more enthusiastic pressing might smooth the hem out!

The end result? I don’t really like it. The pattern – yes , the fabric- no

That’s enough photography of this hoodie that I don’t really love! Thanks as always to He who Cooks for the photos!

Despite that, I did pull it on every night over whatever I was wearing that day for a week after I first made it. Such a cosy layer to put on after work.

I think that makes it a win!

Summer dresses in autumn: Vogue 9237

I made another summer dress.

And accidentally matched the late summer flowers in the Adelaide botanic gardens that I photographed the other day on my lunchtime walk.

I’m not mad at all about that! Such gorgeous colours.

It’s still sunny and warm in Adelaide rather than being rainy autumn weather. So I’ve even already worn the dress!

The fabric is a polyester crepe from seamstress fabrics, an Australian online sewing shop. I’ve not purchased from them previously but they had a sale on something, probably pins or needles, so I bought fabric as well. Like you do.

I really like the colours, the print and the texture of the fabric.

This is Vogue 9237

Many of the reviews noted that the sleeves were tight so I did a large bicep adjustment and added 3.5 cm.

I made a size XL and added about 5 cm to the finished length. It’s a touch too big (that could be the mechanical stretch of the crepe) and possibly a bit too long too.

It looked better without sleeves, but I needed to see if my large bicep adjustment worked, so it has sleeves!

And now I’ve seen the photos I see that the hem is a bit uneven too. Perfectly imperfect.

The back ruffle is a cute touch. And if you want to see it in a twirl from a 50 plus woman, you are in luck!

And, what’s more, this dress has pockets!

I’m marking this one up as a success. Very easy to sew too.

Perfect a long sleeve version could work for actual autumn and winter?

The Sewing Revival’s Fernbird Dress x 2

The Sewing Revival’s Fernbird Dress might be my favourite pattern this summer.

My first version had all the fun of mixing two patterned fabrics.

These two viscoses just wanted to be together. They are both from my local bricks and mortar fabric store, Spotlight.

I bought three metres of each fabric. Because I wasn’t sure what they’d end up as. Eye-roll required. As it turns out, most of the red and almost all of the other fabric have now been sewn into three garments.

The Fernbird dress flanked by Newlook 6471 and In The Fold ruffle sleeve top

Back to Fernbird

This is a super easy pattern.

Totally love how this turned out. Get so many compliments every time I wear it. And I feel great in it every time I wear it.

So of course I made another Fernbird. Also using Spotlight viscose.

The back story to this one is that I specifically had this pattern in mind when I bought two fabrics to make it up in (not like my last post!) Two fabrics.. Because. Worked so well last time.

Yep. Totally good idea. But, see the dress?

The second fabric never made it.

And I’m not mad about it.

This is a fabulous dress pattern. 10 out of 10 would recommend!

Shirtdress mashup: Burdastyle 05/2004 #129 and 07/2004 #135

Mashing up patterns? What could possibly go wrong?

Luckily for me, this turned out much better than expected!

The patterns:

Burdastyle 05/2004 #129 (below left) and 07/2004 #135 (below right). The links go to and the images are reproduced from the Russian Burdastyle site because they’re from so long ago that’s the only one that still lists them

I’ve always liked #129, the green one, but never got around to sewing it. Until now. Nineteen years later.

I’m not in this size range anymore. But that didn’t stop me. I’ve already made #135, the red one, in my size (46 bust 48 hips) so I mashed them up.

My starting pattern had a bust dart so I rotated that to the yoke seam and then converted it into gathering. That was the easy it of the mash up!

I marked up the panels on my front dress pattern piece and then drafted new pieces with extra width at the top for the gathering, using the 05/2004 #129 pieces as a guide.

You can see from the pattern pieces that the gathering isn’t additive – the top of the piece is gathered in but the bottom of the piece is back to what would be the regular width of the base pattern. I replicated this on my pattern pieces. The gathering is modest – about 1.2 times the width of the straight piece it’s sewn onto.

I lined the yoke with white batiste. When my fabric is doubled up, the black shows through the other colours a bit and dulls them down. The white makes them pop.

The gathered and then restrained-back-in panels give the dress a cocoon shape feel – which is a silhouette I love.

Grey hair don’t care

I added pockets – because pockets are always a good idea – and used white batiste for the pocket pieces facing the outer fabric. For the same reason.

Smug sewist because she added pockets

I used the pockets drafted for the Cloud dress. They’re fabulously large.

The lovely fabric I used is a Japanese woven cotton from The Fabric Store. Wonderful to sew and gorgeous to wear.

Such a happy dress!

Twixtmas sewing: Cloud dress by Sewing Patterns by Masin

The relaxed days between Christmas and New Years, a heatwave and an air conditioned sewing room. The perfect recipe for sewing a Cloud dress!

I love the way this dress has been drafted. Racer back with huge puffy sleeves! Genius. Big sleeve energy without the enormous shoulders.

Line drawing from https://www.sewingpatternsbymasin.com/sewing-patterns/cloud

This gorgeous linen from The Fabric Store was a delight to sew, even all that gathering went well (apart from the bit where I sewed one of the layers to the bodice wrong side to right side. Duh)

I paid a lot of attention cutting out to getting the squares lined up and even – a double layer of yellow at the bodice/tier one seam and a smooth transition at the next tier down, plus matching across the vertical seams. It was worth the effort. Uneven seams on gingham irritate me. And there’s been a lot of gathered gingham dresses for sale to be irritated by!

All this pattern matching meant that my fabric length was not quite enough for a full length second tier. Not by much though – 8 cm – and the length looks fine on. Perhaps a longer first tier and shorter second tier would’ve been more aesthetically pleasing for uneven length tiers but that’s being very critical!

You’ll notice that the hem dips up at the front – because the bodice does too. It’s not because my hands are in the pockets!

I’m not convinced the hem should dip up – none of the modelled versions do this. It might be because I sewed a size down from the one that my measurements suggested and that resulted in my bust hoicking it up? I chose this size (4) because the finished garment measurements gave me 5 cm of ease though the bust, which was just at the limit of the ease suggested, and my actual size (5) gave me twice as much as the maximum ease recommended. I like the closer fit through the bodice so I’ll add more length to the centre front on the next version.

The back bodice is buttoned. Which is very cute.

I used vintage mustard buttons from the stash They are larger than recommended so I used 5 buttons rather than 6. I didn’t adjust the facing width to work for my larger buttonholes. Which was a mistake. Macgyvered with iron-on interfacing.

I repurposed a damaged linen pillowcase for the facings. Because it meant that I didn’t have to think about more pattern matching than I needed too.. I know. It’s cream and the gingham is white and yellow. But it works. I didn’t swap my overlocker thread from cream to white either. Slapdash seamstress.

My tip for gathering? Mark the centre front and backs and half way between centres and sides of the non gathered piece with a fabric marker. Do the same on the gathered pics but add safety pins to the markings. Because your marking may disappear when you gather all that fabric up.

I couldn’t resist adding a label to the outside. I had a teeny tiny handmade tag from KATM in mustard. It’s on the lower tier skirt side seam. And probably only I will ever notice it. But. So cute!

I love this dress. Can you tell?

I wore it yesterday on a family trip to the zoo and it was perfect. Swishy. Cool. And SunSmart – crew neck and almost elbow length sleeves.

Why the zoo? Nostalgia. The kids and I used to always go in the holidays when they were younger. Seems like they still enjoy it as adults!

And how could you not when you get to see meerkats after a big night out?

Happy new year everyone!

Lemon Sherbet dress for Felicity: BurdaStyle 07/2021 #119

The other wedding guest dress.

This one was sewn in a delightful rayon nylon blend from The Fabric Store. This is what The Fabric Store say about it (and it still seems to be available – this is not a sponsored post – I just love the fabric!)

A deadstock rayon blend in a lemon yellow horizontal stripe. This lightweight fabric has been woven with a clear nylon warp and a striped weft in varying stripes made up of lemon yellow, candy pink, fine black and white. This unique structure creates a subtly textured fabric with great bounce. A semi-sheer fabric with a subtle sheen and no stretch.

The pattern is BurdaStyle 07/2021 #119

I cut out a straight size 40 but with the main skirt piece (its a rectangle) cut the full width of the fabric (150 cm) rather than as drafted (126 cm). I lined the dress with cotton batiste. I didn’t line the sleeves.

I cut the rectangle bit of the skirt lining the width of the batiste (about 130 cm) and then had the annoying task of having to gather the outer fabric onto the lining and then gather both of them to fit onto the bodice. Oh well, the bit of extra fullness in the skirt was probably worth it!

I lined to the edge of the neckline and slit and then treated the lining as an underlining for the rest of the seams – I sewed the front and back bodices together at the shoulders for each of the lining and the outer fabrics and then, with right sides facing, stitched the lining and outer fabric bodices together at the neck and slit before clipping, turning and under stitching. No interfacing – the other fabric is light but tightly woven and hasn’t stretched out or distorted. Yet!

The neck is a bit tight and high. I’m glad I left the slit open rather than adding a button – that button would never have been used! The bust darts are a bit too high too.

Melissa for Fehr Trade posted about this dress recently and also found the bust darts and the neck too high. So I’m calling out the drafting as being a bit off.

The fit is loose, as you’d expect from the line drawing. So I added thin ties, attached where the side seams of the bodice meet the skirt, to create a little more shaping at the waist

The sleeve ‘cuffs’ are cute

I’m very happy with my unintended but quite excellent strip matching across the bodice to the sleeves!

And its a thumbs up from Felicity!

And this is the dress that was worn on the day!

Here she is on her way to the ceremony. With bare legs and the most delightful pale pink shoes that coordinated so well with the dress… and if you are a shoe lover – you’ll want to take a closer look at these. Fortunately they’re featured in another wedding post

I’m so pleased the weather cooperated and she wore this dress to the wedding. It was my favourite out of the two.

Red and olive colour blocked dress: Style Arc Mila

Another experimental dress!

How did this happen?

Well, I had intended to add olive cuffs to my last red Bella dress but the fit issues dampened my enthusiasm.

But you know how it is – I still had the olive fabric out and there was a sizeable remnant of the red fabric left. Plus a new to me pattern to try: Style Arc’s Mila dress, which seemed perfectly suited to colour blocking.

Why not give it a try?

This is a size 16 and I like the way it fits

That V shaped bit in the centre was less tricky to do than it looks

My two fabrics were both from the stash. I’ve told you about the red before – it is a woven rayon from a local designer roll end sale in 2014. Almost vintage! It has more structure than a rayon normally has, a dry hand, and no stretch.

The olive is a polyester hi-tech microfibre from emmaonesock with great texture, drape and mechanical stretch. It was bought with a garment for Felicity in mind back in 2019 but she was less than happy with its colour so it’s languished in the stash. Despite it’s loveliness.

The Mila dress is an interesting design. The skirt has no side seams and curves from that V just under the bust to well below the waist at the back

I really like it. What I now need to do is work out how to add long sleeves to it so I can make a winter version.

Any tips?

Sizing up Bella

Tessuti’s Bella dress pattern is an old favourite. Search through my blog – you’ll see I’ve made several Bella’s for myself and Felicity.

But I am no longer the same size thanks to having so many birthdays that I’ve hit menopause. So it was time to test another size.

Version one was in a red rayon fabric from my stash but originally from a designer fabric sale. It’s an odd fabric. Gorgeous colour but has a very dry hand and is prone to creasing.

I traced off and made a size 16 with shortened sleeves.

It was too big through the shoulders – the only bit that really needs to fit.

So I added a 1.5 cm tuck to the centre front,going down 15 cm, to remove 3 cm of the excess fabric through neck through the bust.

This sort off worked.

Although the armscyes are too low – I really should not be able to lift up the hem this much when I raise my arm! Another pointer to the size being wrong

Whatever. I have a dress I can wear. And the colour is still gorgeous despite the fit!

So for my next version I went down a size to size 14.

This one is made in an embroidered wool blend purchased on holiday in Leicester.

Souvenir fabric!

I didn’t have a lot of fabric but was pleased that I had enough to be able to line up the embroidered motifs reasonably well.

It’s lined with a polyester galaxy print which I bought as a roll end several years ago for a fabulous price because it was so last years.

Now so dated after sitting in my stash that’s it’s best used as a lining.

The facing is a grey linen. Because I thought the wool might be itchy. But it was a bit of an afterthought once I realised that lining right to the edge with the galaxy print might not be such a great idea. So I overlocked and stitched it on a top of the lining rather then doing things properly with a seam.

I used a wool 4 cm strip for the pocket openings for the same reason. And also just stitch an overlocked strip on top of the lining. What can I say? Consistently slapdash!

I used a wide stain bias from the stash for the hems -and the stitching just disappeared into the wool.

Love it when that happens

So. What do I think about the sizing? This is probably the right size. But the fit is not great. The shoulders are good but it’s a bit tight through the bust whilst being looser through the back.

And of course everywhere else is fine because the style is loose everywhere else

Bottom line -I like the dress. I’m not convinced Tessuti’s block works for me. It did work when I was a smaller size. Now, perhaps not so much.

So what other trapeze style dress pattern are out there that I should try? All suggestions most welcome 🙂

Should’ve made a shirt

I’ve had this small floral woven cotton in my stash for a while. It’s always been earmarked for a shirt. Shirting weight, small floral. Makes sense doesn’t it? Light grey and white. Perfect as corporate wear.

But I had an idea in my head that I wanted to use the Closet Core Cielo dress pattern for. And I needed a wearable toile because the hips are a bit tight on the last Cielo dress I made.

Yes I used the shirt fabric. And played around with a coordinating fabric on the back yokes and as a sort of flat piping on the sleeve cuffs.

I have successfully tested the sizing (too big – took in the side seams).

But I haven’t made the best use of this fabric – too light both in weight and in colour.

It’s a fail.

So some further experimentation couldn’t really make it much worse (spoiler alert – it did).

I asked myself: Could Cielo be used as a very casual interpretation of a Chanel jacket inspired dress? Likes these from the Chanel Spring 2022 RTW collection?

Chanel Spring 2022 RTW image source: Vogue.com

The answer is maybe but probably not. The loose fit makes it a very loose interpretation of Chanel gloriousness. It might be more successful in a more appropriative fabric.

What did I do? I added a strip of contrast fabric at centre front-the length was determined by the amount of remnant I had . I topstitched it in place. I then added two bands to the top of the pockets. The topstitching of these was tricky to do with machine sewing but looks ok if you’re not close. I didn’t have enough for a neck band.

I wore this dress on very hot days only. When I’m not likely to be seen in public….

I should’ve made a shirt. But it was fun whilst it lasted.

Retro Hope dress

Piping and a large print on a donkey grey background seems to have taken my third Hope dress into retro style.

And I like it!

This is Style Arc’s Hope woven dress at knee length. With a thin waist tie attached to the side seams.

The pattern description says the dress is in two lengths and the illustration shows a knee length version. But my PDF pattern does not have a seperate skirt pattern piece or a ‘cut off here’ line on the skirt piece or any information about length in the instructions about how much length to remove.

A totally easy hack – I removed 22 cm from the length – but odd that the pattern is silent about it.

This lovely large print is a viscose woven purchased from TMOS 5 years ago on holidays in the UK.

TMOS, unfortunately not facing the camera (unfortunate because he has a lovely smile, not just because he is handsome..)

It’s extra special because my dear friend Melissa and I literally bumped into Karen of Did You Make That? and Ella at the stall. What are the chances of that!!? The famous sewing blogger from London, from whom you heard about TMOS and the reason you went there, turning up at TMOS at the same time you went there all the way from Australia!

Yes Karen is wearing a CCP Charlie caftan in Liberty. Obsessed with sewing details? Who? Me??

I added piping because I had some in my stash and I wanted to highlight the raglan sleeve seam lines.

I had just enough for the front and the neck but not enough to pipe the back. Coffin back. Guilty as charged. But also in line with the retro vibe of this dress.

Also guilty of sloppy sewing, as my photographer (He who Cooks) pointed out to me – “there’s a pucker or something you’ve sewn badly at the waistline on the back”.

What sort of monster have I turned him into? I know I talk about sewing. All. The. Time. But surely that’s not to blame?!

I’ve got to assume I was distracted by that unintentional not-pattern matching through the centre back seam. Whatever. It didn’t distract him!

I added thin ties to the side seams to reduce some of the gathering at the waist. What it actually does, of course, is bring the side seams forward and put more of the fullness at the front. Another reason to be accused of coffin back.

The forward side seams are quite obvious in the photo above, but so are the pockets. Like all great dresses, it has pockets!

It could well be time I moved on from this pattern. But it is such a delight for make and wear.

Is three Hope Dresses too many? Is three Hope Dresses enough to qualify me for the #HopeDressSpringsEternal club?

So many questions…